Thursday 21 April 2016

Descendants of the Sun Bento

Have you been chasing the Korean drama, Descendants of the Sun (DOTS) for the past two months too? Sorry, if you are not, you probably won't understand what I'm rambling about in this post, lol. I've been addicted to DOTS for the past two months, I usually wait for the drama to be near the end before I start watching, so that I can be spared the agony of waiting for new episodes every week. However, I really like the two leads, Song Joong-Ki and Song Hye-Kyo, and I felt this story would be good, so I started watching from episode 1. I like Song Joong-Ki, and also Yoo Ah-In since SungKyunKwan Scandal, but sadly, I don't really like their subsequent dramas, so I never did finished watching those. As for Song Hye-Kyo, I like her since Autumn in my Heart, the very first Korean drama I watched and I always think she is the prettiest Korean actress.

IMG_1342
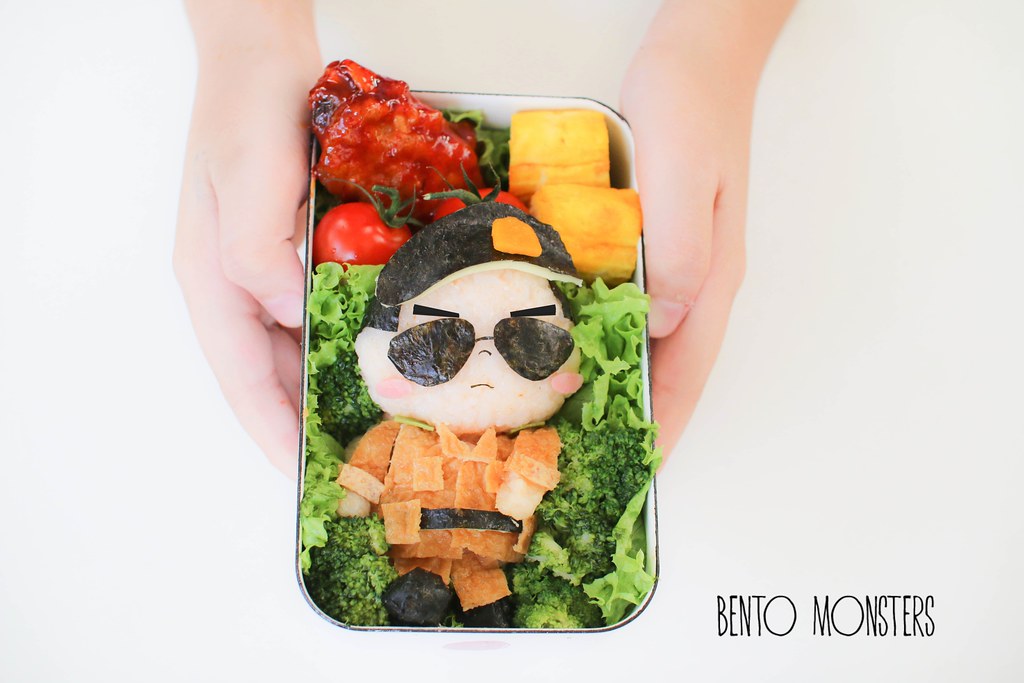
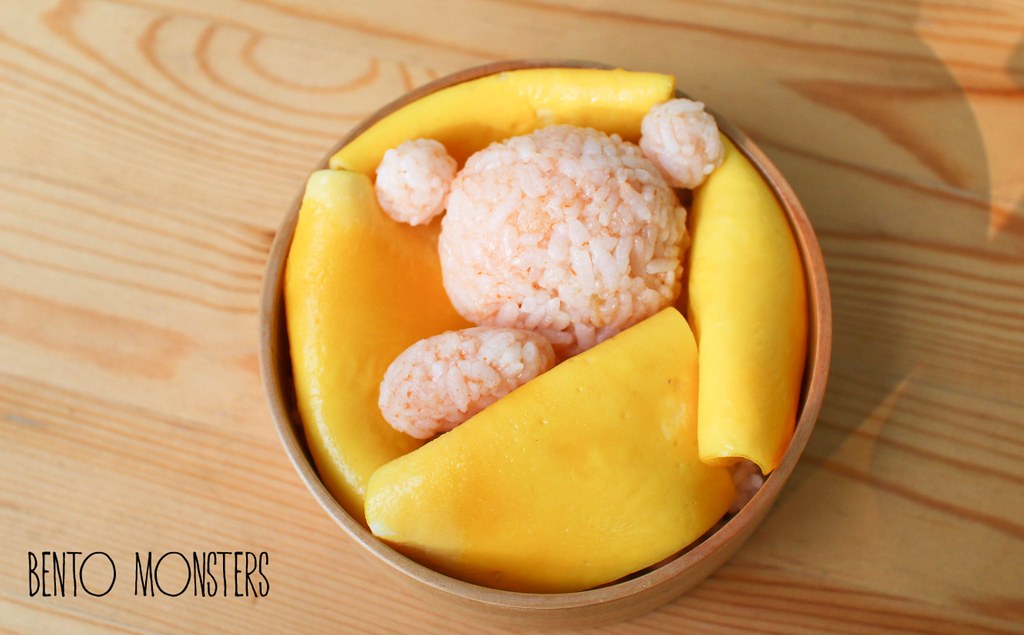
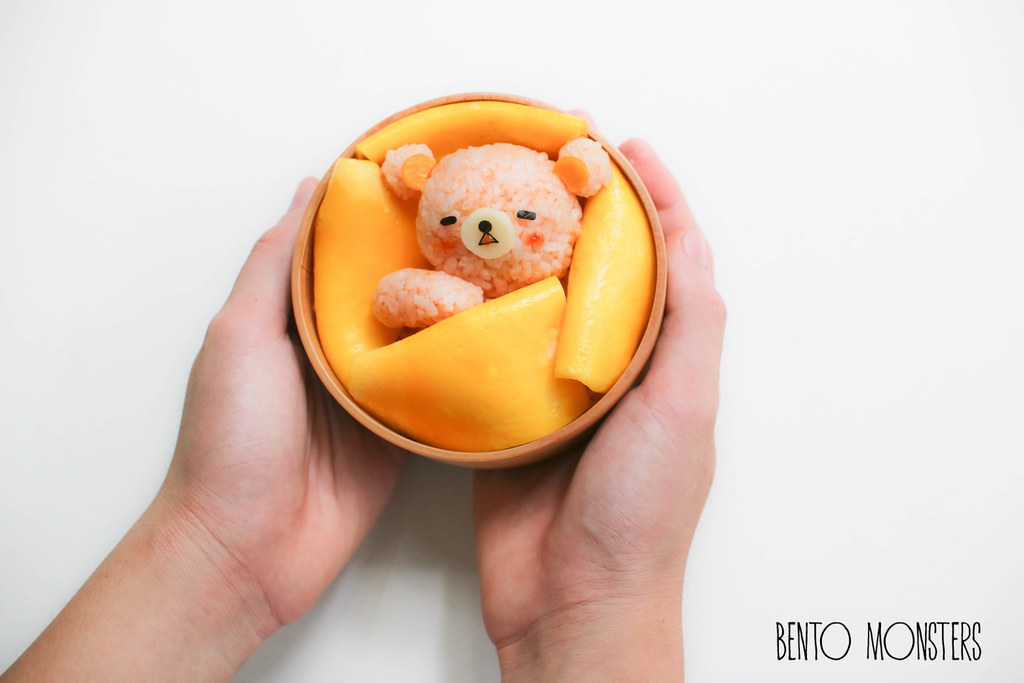
Captain Yoo Shi-jin aka Big Boss bento, the soldier Song Joong Ki played in the drama. I was craving for korean fried chicken so I cooked some that day, just apt for this Korean drama bento, lol.

IMG_1340
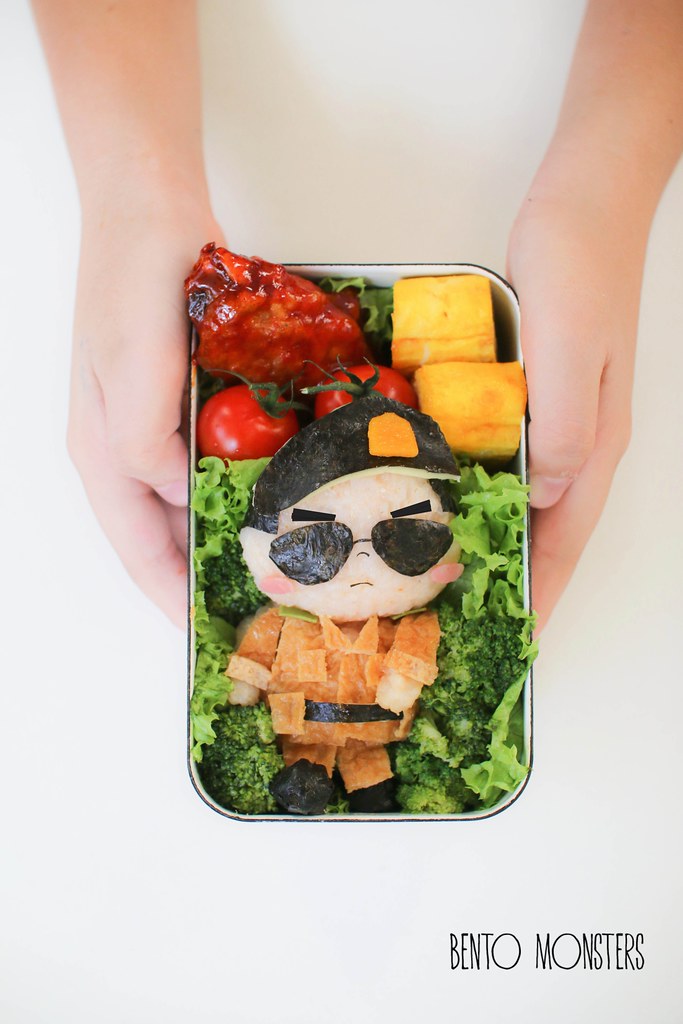
I edited the eyebrows here, the unedited version can be viewed on my Instagram. After completing the bento, I thought the eyebrows were not suitable and wanted to change it. LT asked me to help him with his work at that moment and I totally forgot about changing the eyebrows after I was done with helping him. *slaps forehead* Hiaz, since I have no intention of remaking this again, I decided to just edit the eyebrows for this post.

IMG_0552
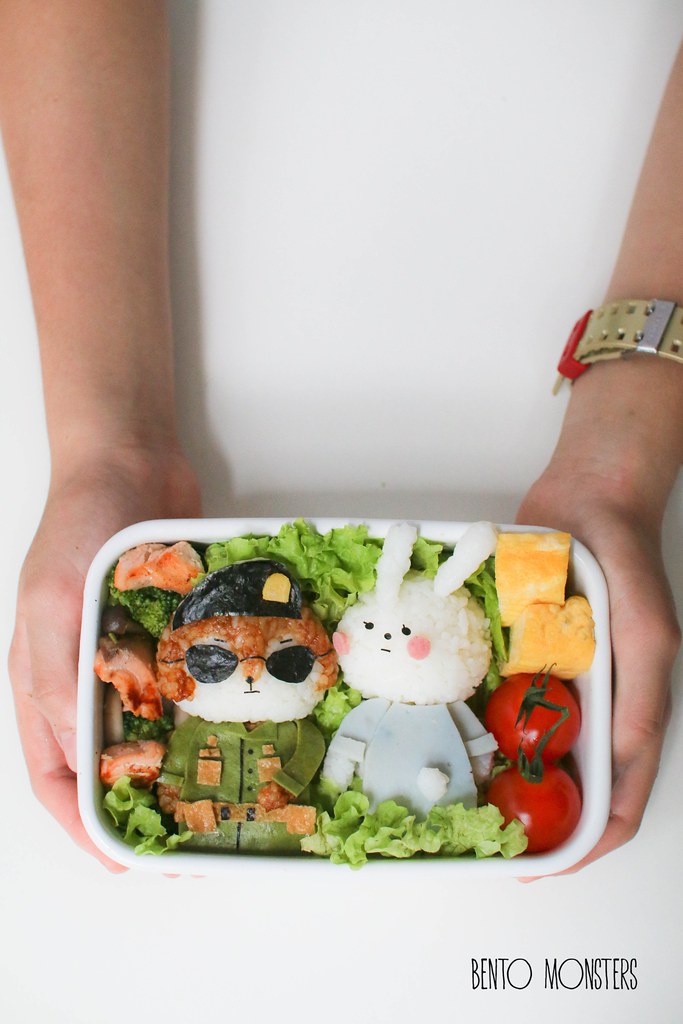
This version has the two leads in plush form. These two plush appears in DOTS too. They are from Bonicrew and can be purchase in soldier uniform, just like in the drama.

IMG_0555
I really enjoyed DOTS, I think it's my favourite drama so far, although I know some people watched and still can't comprehend what the hype is all about, my hubby is one of them. -_- There are flaws here and there, but the leads played their roles so well, I guess I overlooked all those. I think the best parts of DOTS were all in Urk, the last 4 episodes could have been better written, especially so since it's pre-produced, I don't know why the writers don't develop some parts in those last few episodes better so it makes more sense. But never mind, the happy ending makes up for it, lol.

IMG_1209
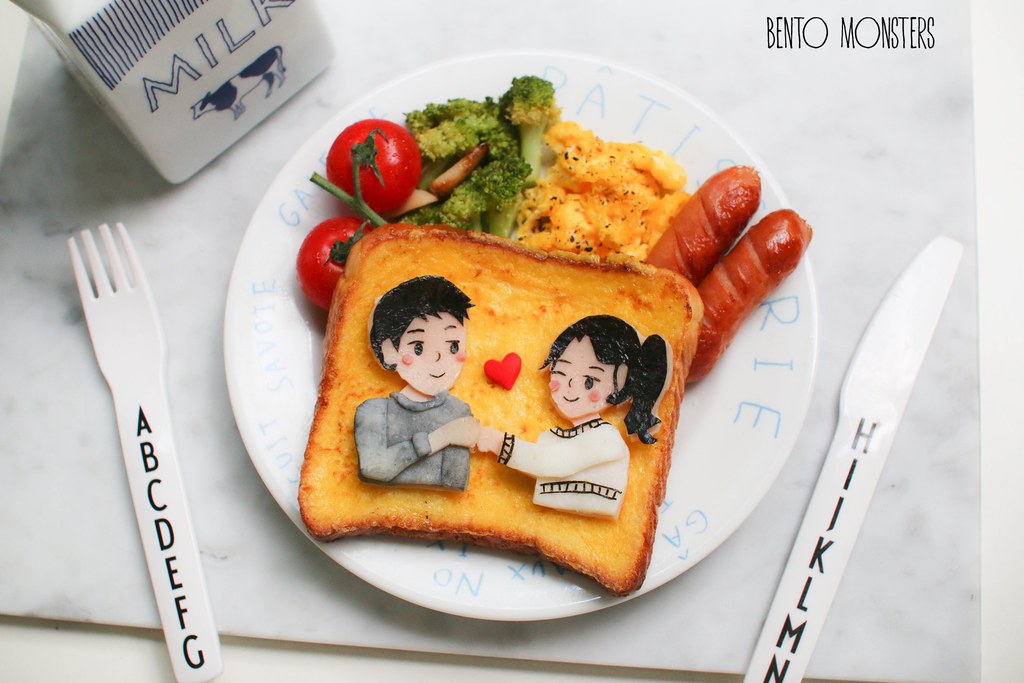
This last one was taken from a photo of the two leads after their Hong Kong press conference, when they were doing the fist bump. I made this breakfast for myself, not the boys. The boys were still at school while I was eating this.

IMG_1210
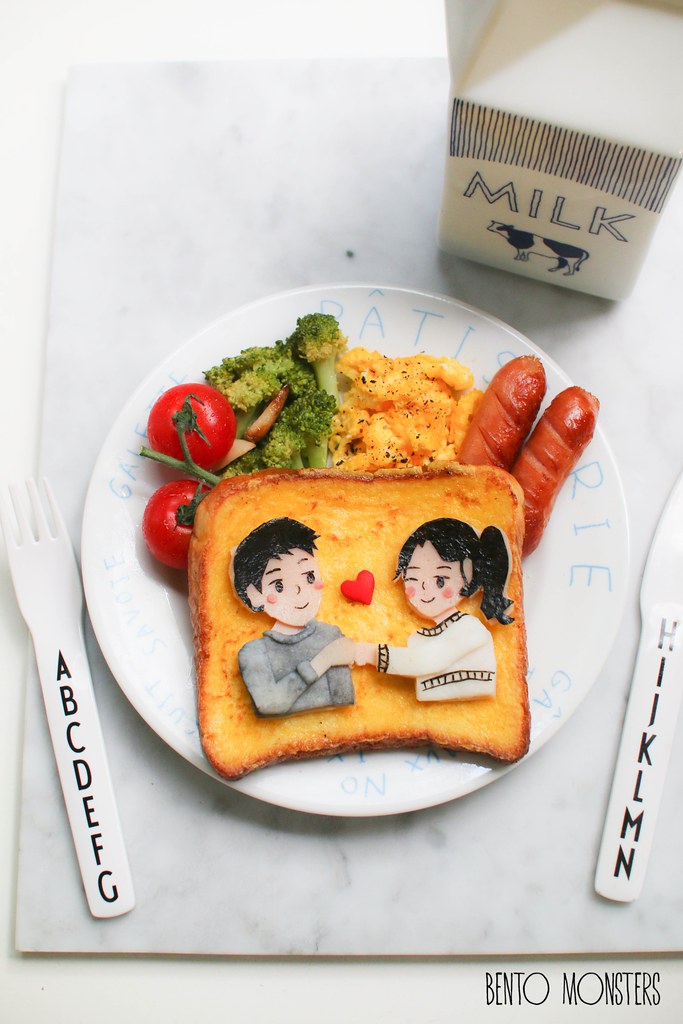
There were so many cute moments between these two leads during the Hong Kong press conference, as compared to the Korean one, where they were so stiff and proper. They have so much chemistry and look so good together, I hope they date for real, though I think they most probably already are in secret. :)

Wednesday 20 April 2016

Sleeping Rilakkuma Bento

Exams are coming soon again, time seems to pass so fast, we are almost halfway through the term, seems like yesterday the new school year just started. I dislike getting my boys to do revisions, they dislike it much more, but it's something we can't avoid and have to go through.

IMG_6840
I was looking through some of my archive to see what  I've yet to blog, and decided on this sleeping Rilakkuma bento, which I took step-by-step photos of.

IMG_6831
I feel like snuggling in bed with my blankets too, lol. Maybe I should go and do so after finishing up this post and leave the chores aside for a while. :P

IMG_6828
I used ketchup to colour the rice here, if you prefer Rilakkuma to look brown, you can also use dark soy sauce/teriyaki sauce to colour the rice instead.

rilakkuma
As with all my tutorials, I'm not claiming this is the correct or best way to make this bento, but I'm simply just sharing how I made it.

IMG_1230
You will need a thin omelette, you can season it with a pinch of salt, and cook it over a low fire.

IMG_1232
Add ketchup to rice and mix well.

IMG_1233
Scoop rice onto cling wrap and mould out the head, ears, hand and body as shown in the picture.

IMG_1235
Fill the base of your bento box with a layer of rice loosely, before placing the head and body onigiri on top. You can also arrange lettuce or your side dishes at the base instead of using rice.

IMG_1234
Slice omelette into quarters.

IMG_1236
Fold each omelette quarter and arrange around the rice.

IMG_1238
Add in the hand and ears, you can use pasta stick to sercure the parts.

IMG_1239
Using a round cutter or a pair of scissors, cut out the ears from cheese.

IMG_1240
Using a round cutter or a pair of scissors, cut out the mouth from cheese.

IMG_1244
Using a nori punch, punch out circles for Rilakkuma's nose, the other details can be cut out using a pair of scissors.

IMG_1244
Dab on some ketchup using a chopstick and ta-dah, you are done.

IMG_1251
Sorry, not too good with explaining, but hope the photos help you to visualise how I did this. :)

Tuesday 12 April 2016

Sakura Jelly, mousse & Cheesecake

It's the sakura season again, probably towards the end of it now. How I wished I can be in Japan now. Since I can't go on holiday during this time of the year, I made some sakura desserts instead.

IMG_1110
First up is sakura jelly, this is actually quite easy to make, check out my recipe at the end of the post.

IMG_1120
You will need sakura honey syrup and kanten powder for this. They can both be substituted with honey syrup and agar agar powder respectively, but the taste and texture will be slightly different.

IMG_1123
Sakura are still so pretty even when dried, the flowers taste like sour plum, since they are pickled.

IMG_1174
The second dessert I made was Sakura cheese cake. I'm actually missing an ingredient, which I wanted to use to decorate, I thought I had it at home but I could not find it, hiaz. I think I might remake this again next year, if I can remember.

IMG_1200
The bottom layer is crushed digestive biscuit. The cheese layer is mixed with sakura paste and the top layer is the same as the jelly recipe I'm sharing in this post.

IMG_1187
I also made some sakura desserts and shared the recipes previously, you can get the sakura konnyaku jelly recipe here, and sakura macarons recipe here.

IMG_4230
I found this sakura tricolour mousse in my archive, I think I made it around two years back, shared it on my Instagram, but did not shared on my blog. The pink layer is sakura flavoured, white is vanilla and green was green tea.

SAKURA JELLY RECIPE

Ingredients:
Bottom layer:
250ml water
3 tbsp caster sugar
2g kanten powder
100ml fresh milk
4 tsp sakura honey syrup
pink food colouring

Top layer:    
300ml water
2g agar agar power
3 tbsp sugar
4 tsp sakura honey syrup
8 pickled sakura blossoms

Method:
  1. You will need this mould, but you can also use a cake mould.
  2. IMG_1093
  3. Rinse the pickled sakura to remove excess salt and soak for 30 minutes. Gently pat dry the flowers on paper towels. 
  4. IMG_4040
  5. For the bottom layer, boil all the ingredients except fresh milk, food colouring and sakura honey syrup in a pot at medium heat. Keep stirring the mixture as it heats up. Remove from heat and add fresh milk, food colouring and sakura honey syrup into it, and stir to mix well. Pour mixture into the mould. Leave to cool and place in the fridge to chill for half an hour. 
  6. IMG_1094
  7. For the top layer, boil all the ingredients except honey syrup in a pot and stir to boil at medium heat. Remove from heat and add sakura honey syrup into it and stir to mix well. Pour mixture into the mould. Gently place the sakura blossoms into the mould , gently shake the flowers in the jelly liquids they will open up. You can use a toothpick to adjust the petals.
  8. IMG_1095
  9. Chill in the fridge for at least 2 hours before serving.
  10. IMG_1118

Saturday 9 April 2016

Totoro Chiffon Cake Pop

Sorry for the lack of updates, quite slack these days, because I don't feel like turning on my laptop to blog at night. -_- I'm finally going to update another overdue recipe today, Totoro chiffon cake pops. Sorry, keep putting it off as I'm lazy to edit the photos and type out the recipe.

IMG_0203
There you go, here's how they look like, quite happy with how they turned out. The way to make this is quite similar to the Gudetama Easter chiffon cake I've shared earlier.

IMG_0212
I used charcoal powder to colour the batter grey. If you can't get hold of it, you can also use black food colouring or grinded black sesame to substitute.

IMG_0227
Here's a closer look at how they look. Quite fun to eat them this way, and I also like that chiffon cakes are lighter and healthier than the usual cakes.

totorochiffonpop
I used fried pasta sticks to attach on Totoro's ears, if you do not want to do this, you can also make a slit on the cake to insert in the ears.

TOTORO CHIFFON CAKE POP RECIPE

Ingredients:
(A)
2 egg yolks
30ml milk
30ml canola oil
15g sugar
60g cake flour
Pinch of salt
1 tsp vanilla essence
Charcoal powder

(B)
3 egg whites
1/8 tsp cream of tartar
35g sugar

melted chocolate
fried pasta sticks
8 egg shells

Method:
  1. Prepare egg shells by using a spoon to gently crack the narrow end of the egg, make a hole and drain the contents. Remove the white membrane inside the egg. 
  2. IMG_0163
  3. Prepare (A), whisk egg yolk and sugar together till sugar melts.
  4. IMG_0576
  5. Add in vanilla essence, oil, milk and salt and mix well.
  6. IMG_0577
  7. Sift in cake flour and mix well.
  8. IMG_0166IMG_0579
  9. Scoop out 5 tsp of batter into another bowl and leave it plain (A1), set aside. Add black charcoal powder to the remaining batter, half a tsp at a time, till you get a dark grey batter (A2). Make sure the colour is a shade or two darker than the eventual colour you want, as the batter will be lighter after mixing in (B). Set aside.
  10. IMG_0174
  11. Prepare (B), whisk egg white with cream of tartar for 1 minute, then gradually pour in sugar and continue to whisk till firm peaks.
  12. IMG_0168IMG_0170 IMG_0173
  13. Scoop out 10 tbsp of mixture (B), gently fold into mixture (A1). 
  14. IMG_0581
  15. Pour batter into muffin cups or mould. Bake at 150C for 15minutes or when a skewer inserted comes out clean.
  16. IMG_0584
  17. Fold the remaining mixture (B) into mixture (A2) gently. 
  18. IMG_0176IMG_0177
  19. Fill into egg shells till around 2/3 full. Bake at 150C for 15minutes or when a skewer inserted comes out clean.
  20. IMG_0180
  21. Let cakes cool down completely before cracking and peeling off the egg shell slowly and removing them from the mould. Slice off the bottom of the cake to flatten them, keep the sliced off portion for step 13.
  22. IMG_0185
  23. Slice out the white cake and cut out circles using cutter.
  24. IMG_0186
  25. Using the sliced out portion from step 11, cut out ears using a cutter or a pair of scissors. 
  26. IMG_0196
  27. Attach on the eyes and tummy using some melted white chocolate. Attach on the ears using fried pasta stick. Use melted dark chocolate to draw on Totoro's features. You can serve them standing on a plate or insert a cake pop stick to them.
  28. IMG_0187IMG_0205