
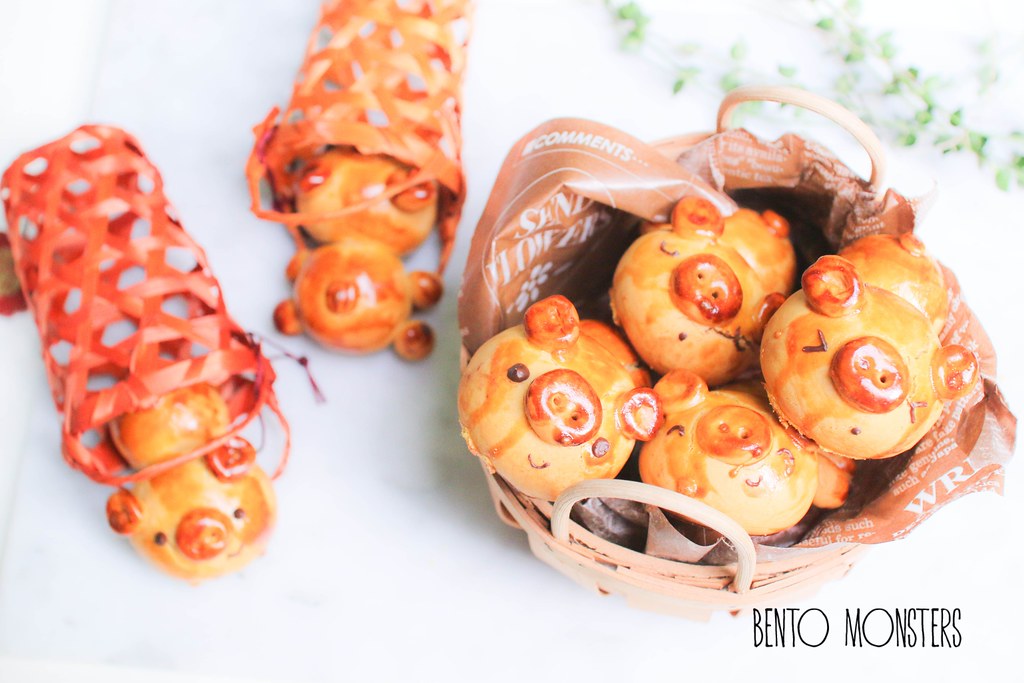
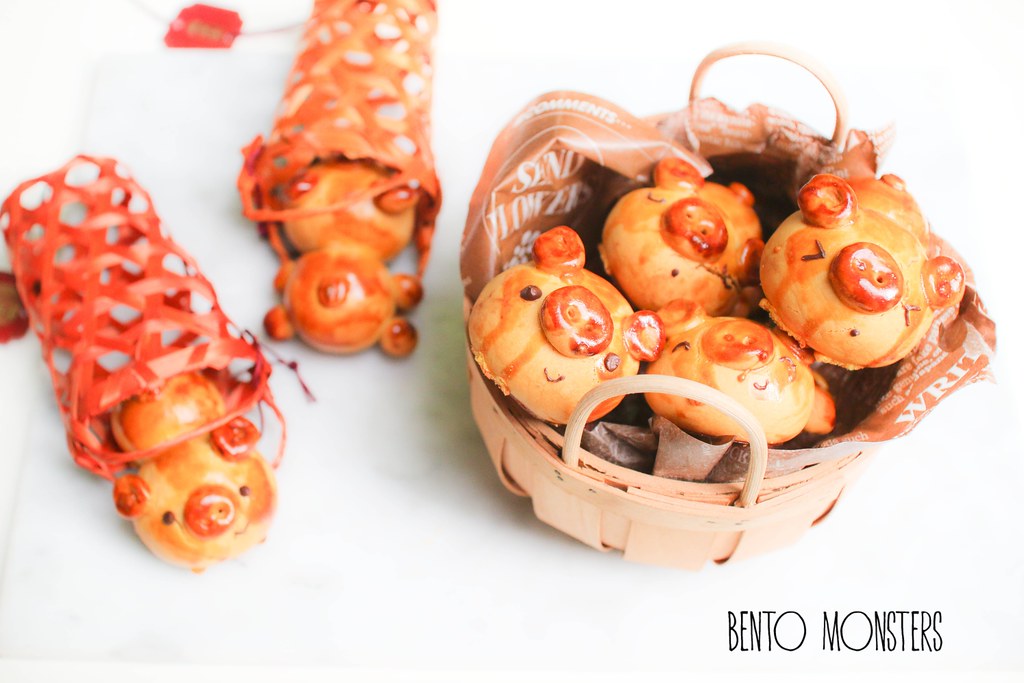
 I actually got this idea to try making my own Piggy Mooncakes because my sister gave my boys two Piggy mooncakes bought in Hong Kong, and they came in a very rustic and nice looking bamboo basket. The usual ones we see here are the colourful plastic ones. You can see the bamboo basket in my pictures, I recycled them as props, lol.
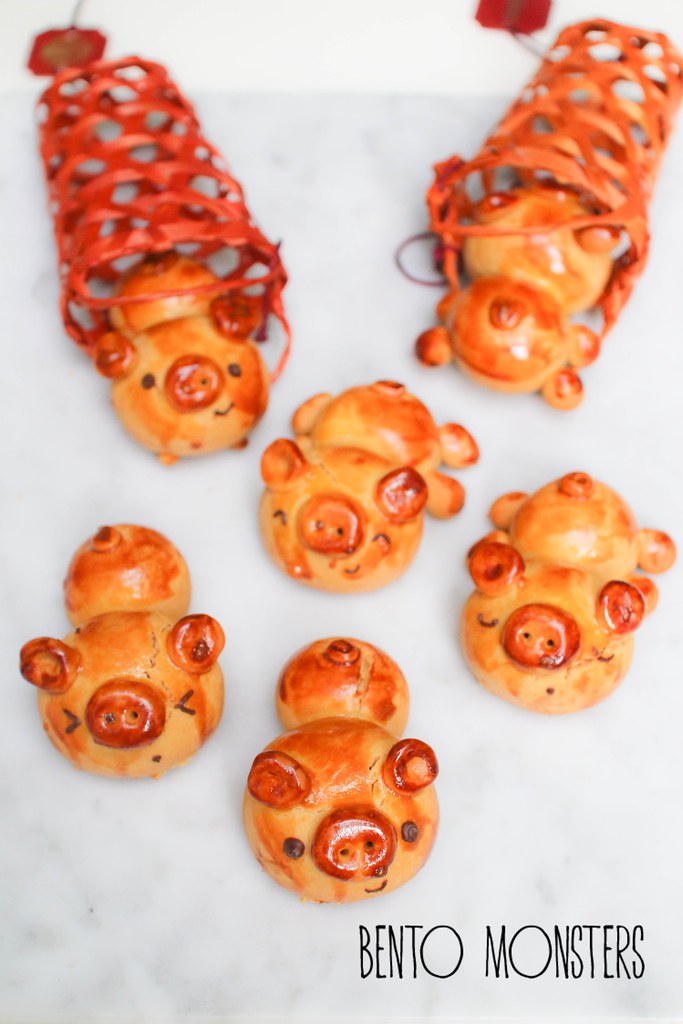
These mooncakes are surprisingly very easy to make. I've made other designs too, I'll probably share them on my Instagram in the upcoming weeks, you can just check there if you are interested.
The piggies taste more 'correct' the next day, they tend to be more crispy out of the oven, but will become more soft the next day.
 I'm showing how to do the version without legs, but you can just add them in if you prefer them with legs.
PIGGY MOONCAKES IN BASKET RECIPE
300g Golden syrup
90g cooking oil
3 tsp alkaline water
400g Hong Kong flour
Egg wash- 1 egg yolk + 1 tbsp milk
Melted chocolate
Method:
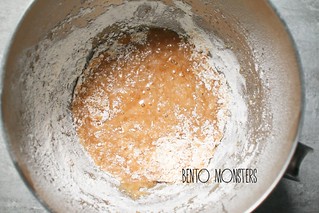
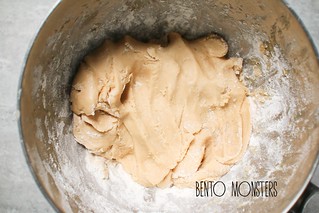
- Using a mixer, mix golden syrup, cooking oil and alkaline water until well combined.
- Mix flour and mix well to form a soft dough.
- If dough is too sticky, you can add more flour. Cover with cling wrap and set aside for 2 hours.
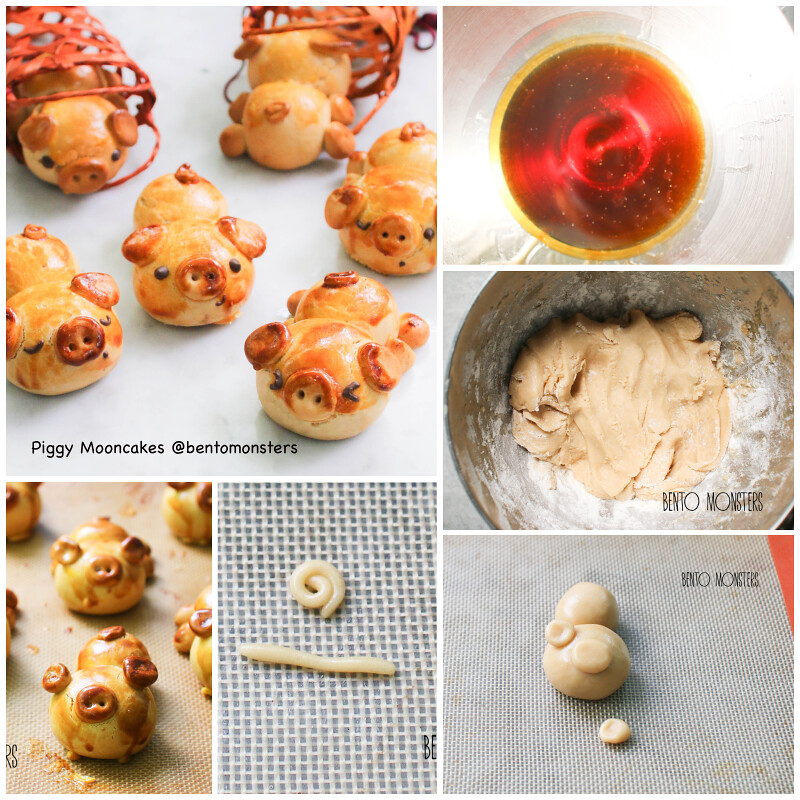
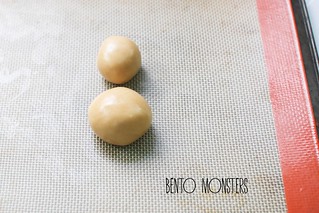
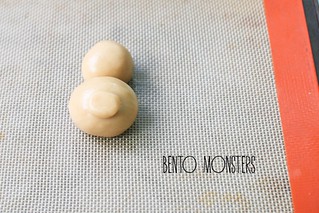
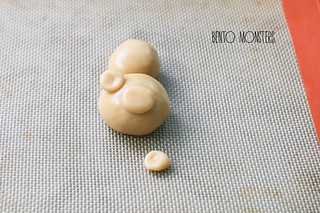
- To make the piggy, roll out the dough into two round dough, one big for the head and one small for the body.
- Join the two portions together by pressing. Roll out an oval shape for Piggy's nose and pressed it onto the head dough.
- Shape two flat pieces of dough for the ears.
- Roll out a thin and long dough and shape into spiral for the tail.
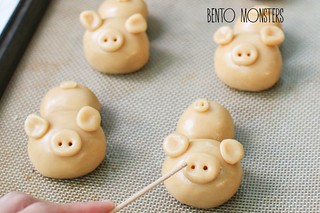
- Use a toothpick to poke two holes on the nose.
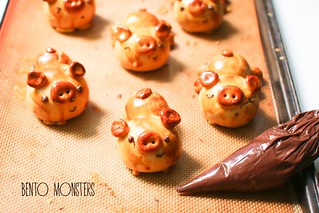
- Brush piggies with egg wash and bake at preheated oven of 180°C for around 15-20mins or when the piggies turn golden brown
- Use melted chocolate to draw on the features.


No comments:
Post a Comment
Thank you for commenting. :) Kindly leave a nick or name if you are commenting as anonymous. Thank you! :)