Monday 28 December 2015

Baymax Christmas Bread

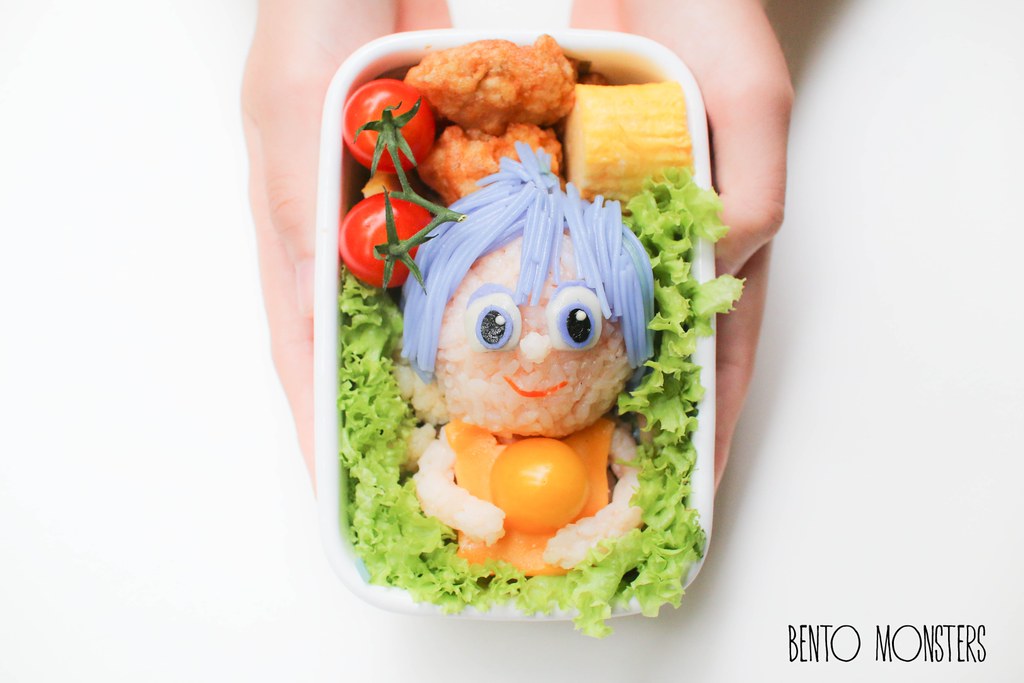
Belated Merry Christmas! Ah, I wanted to get this post up before Christmas but I've been busy since coming back from my holiday last week, it's delayed till now. -_- Better late than never I guess, so I'm still posting it up.

IMG_8851
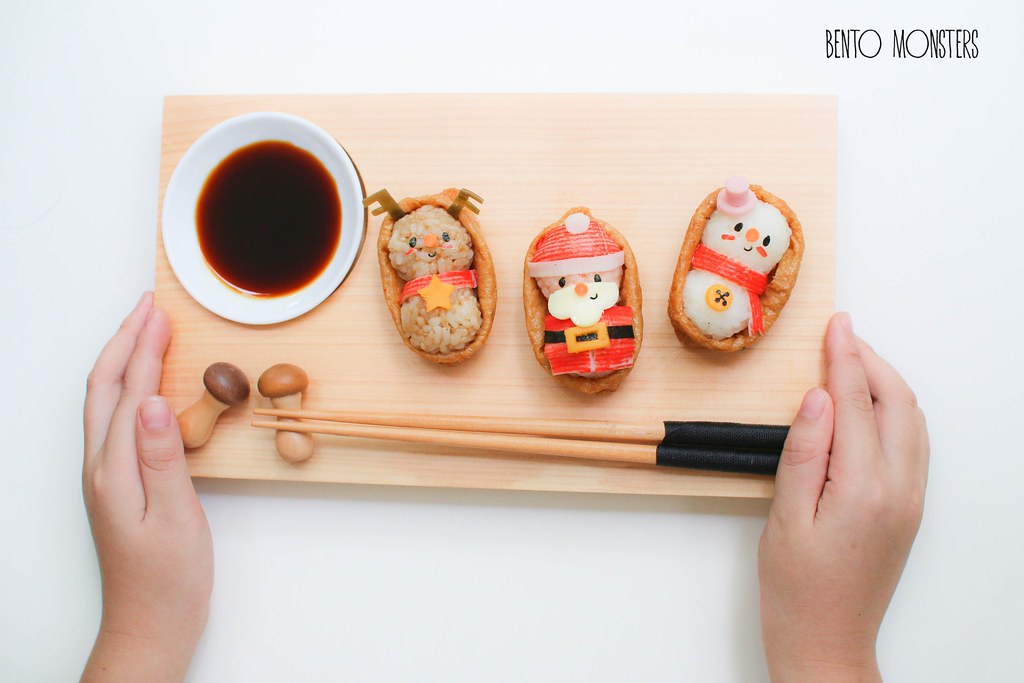
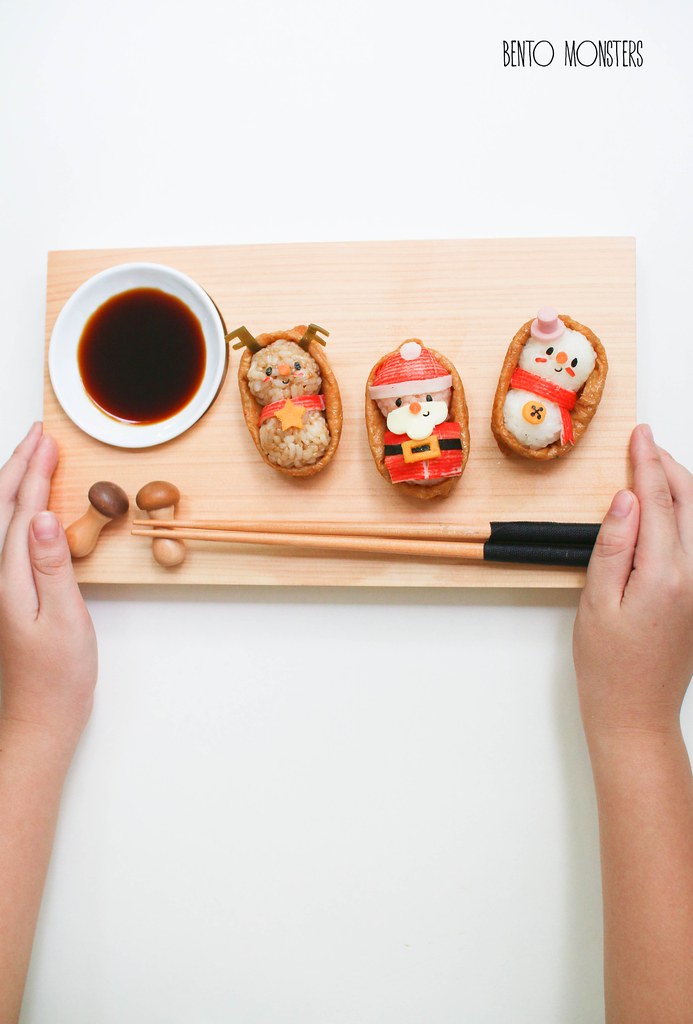
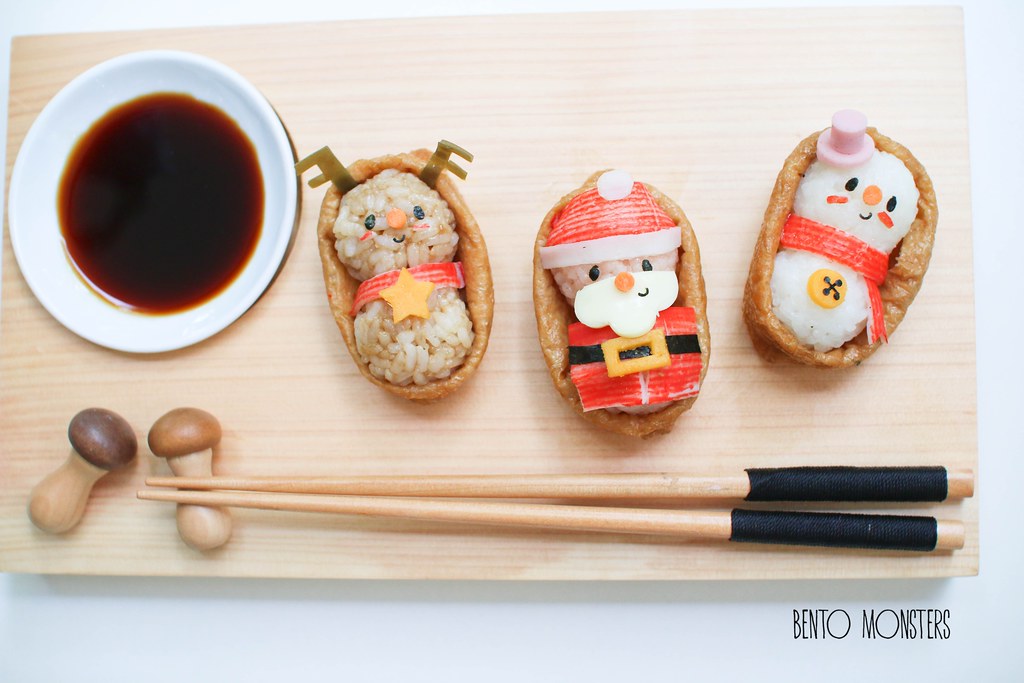
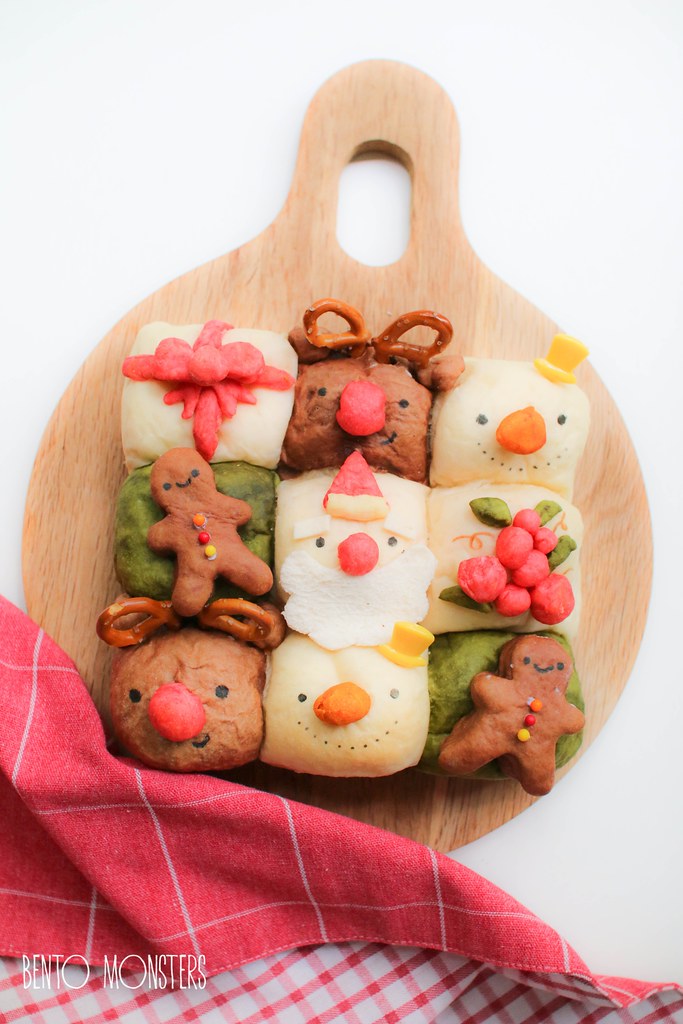
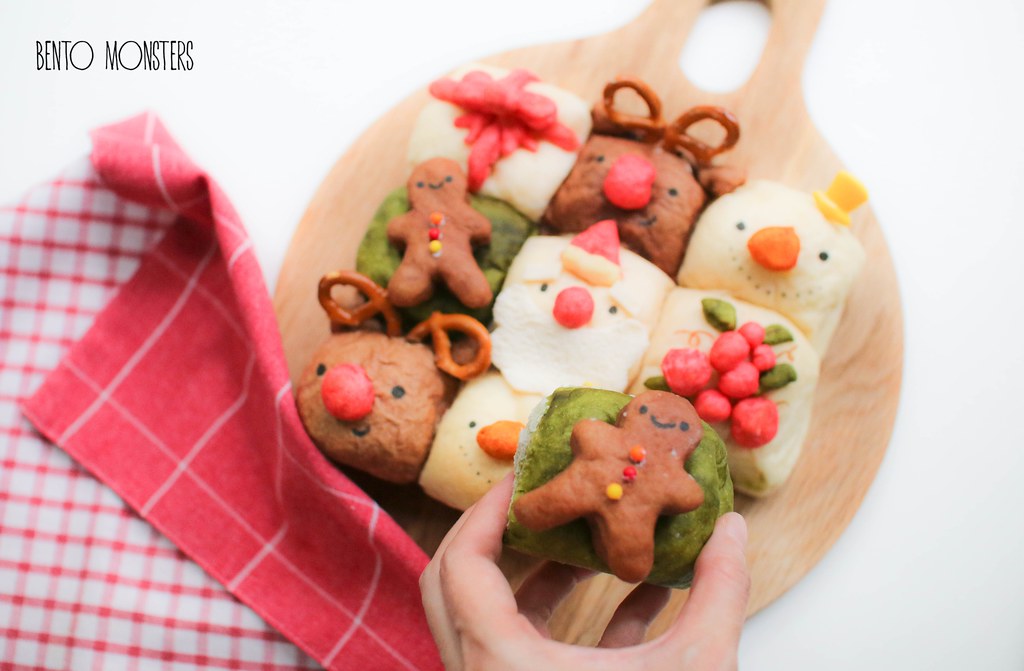
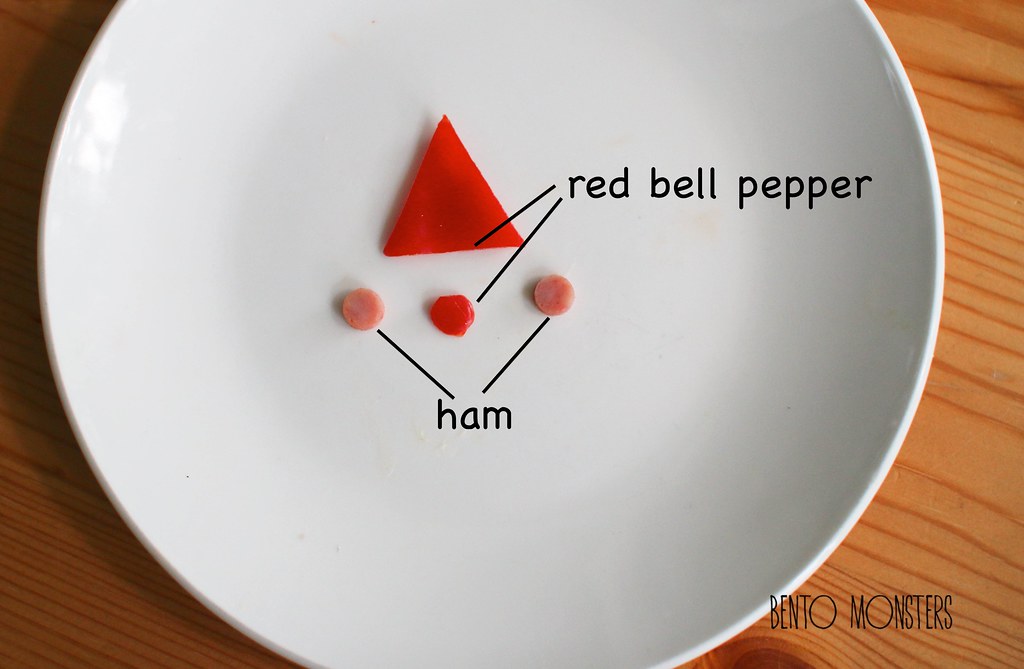
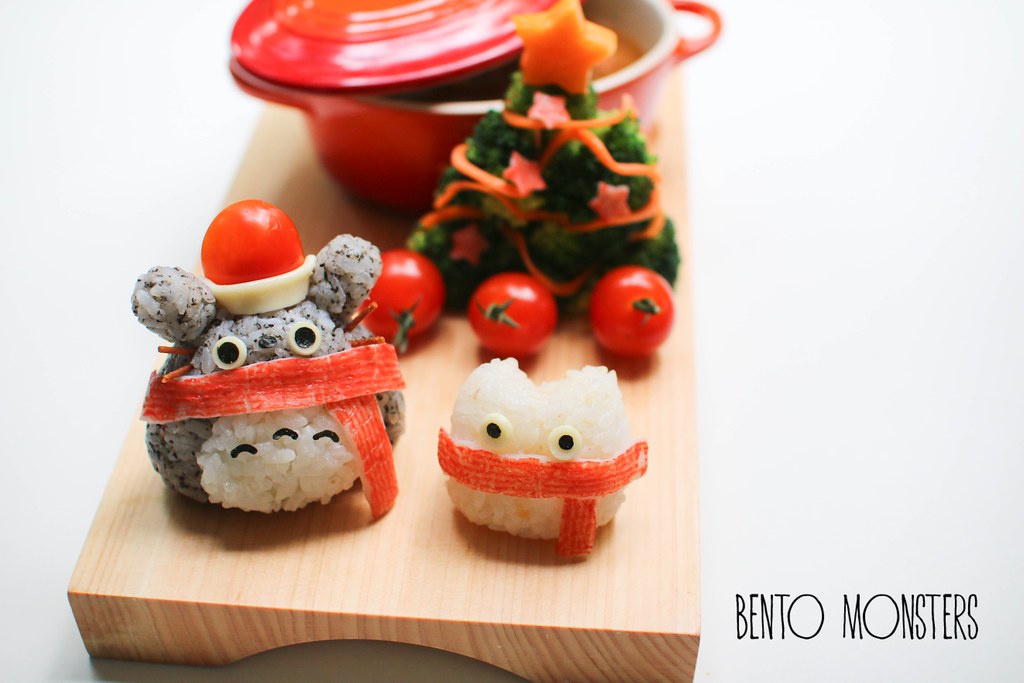
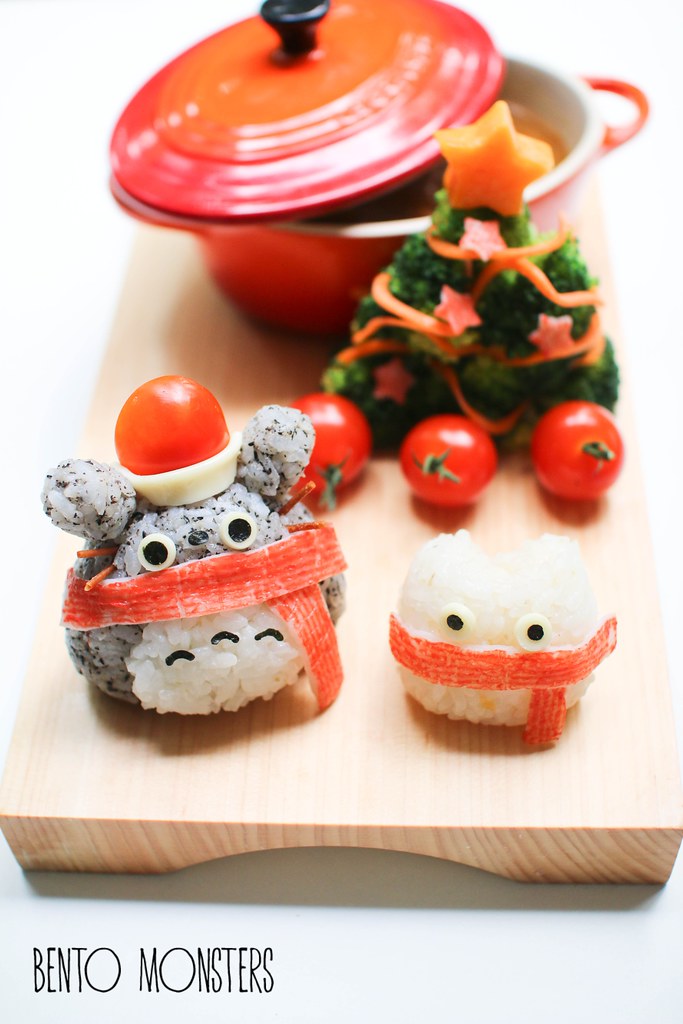
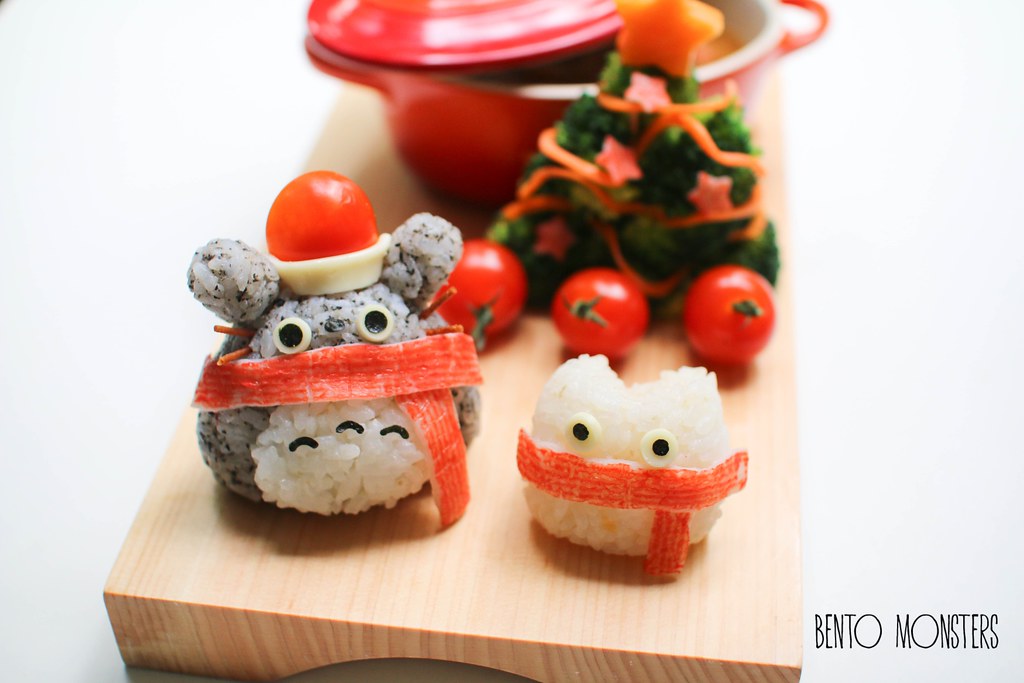
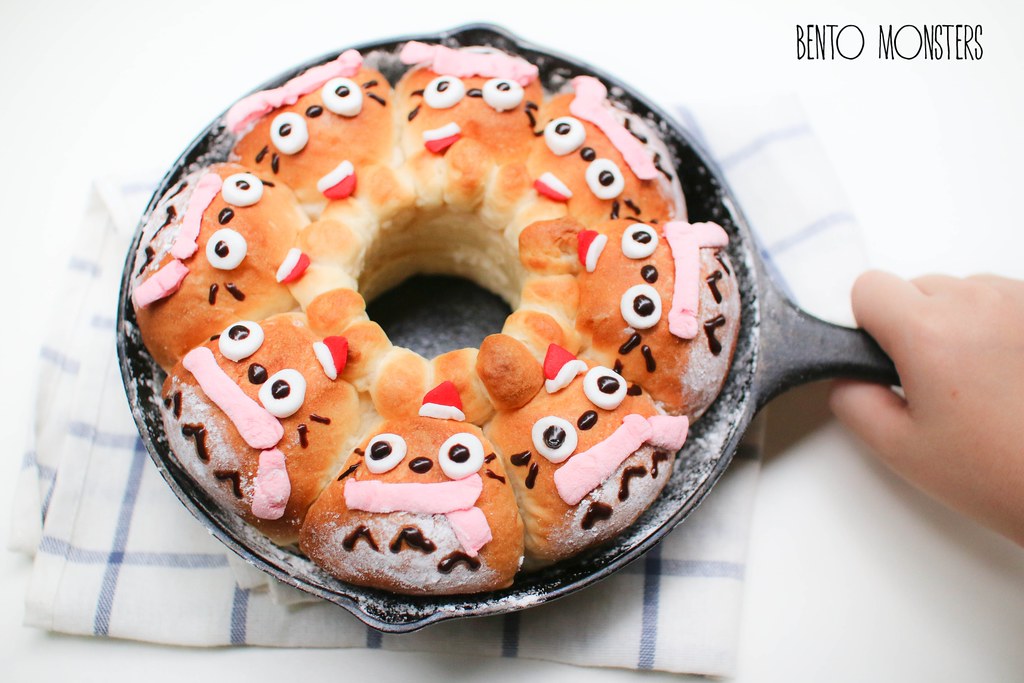
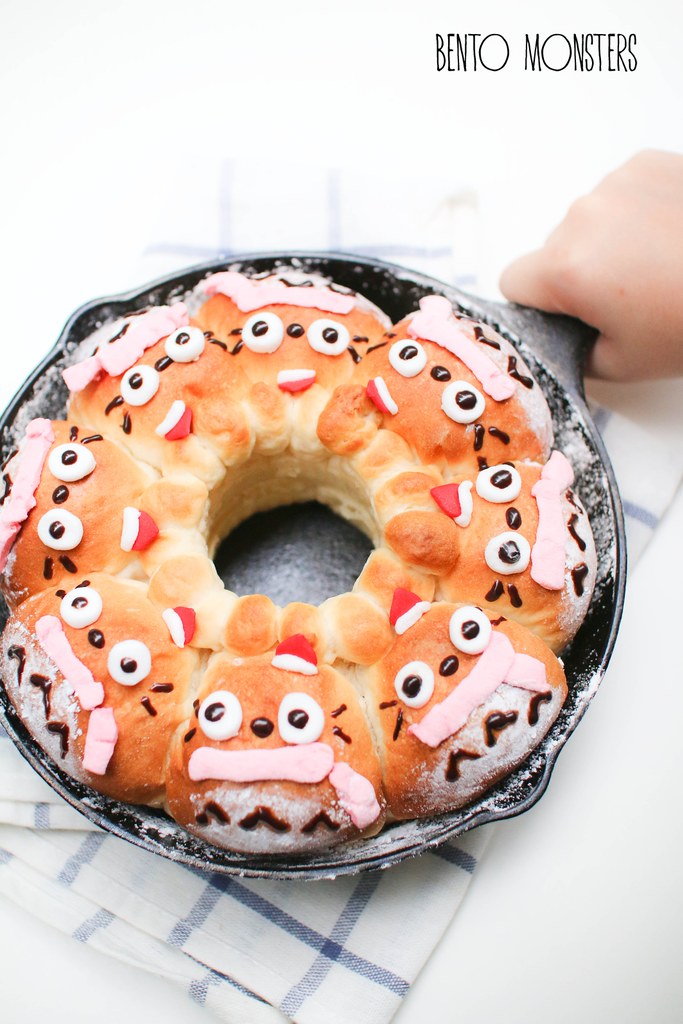
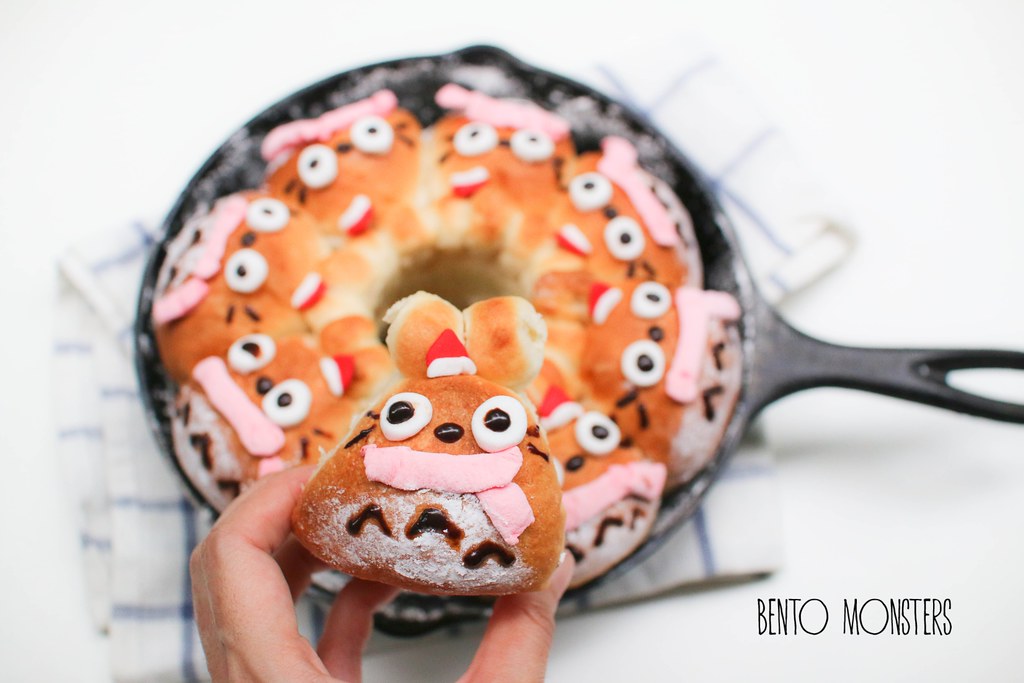
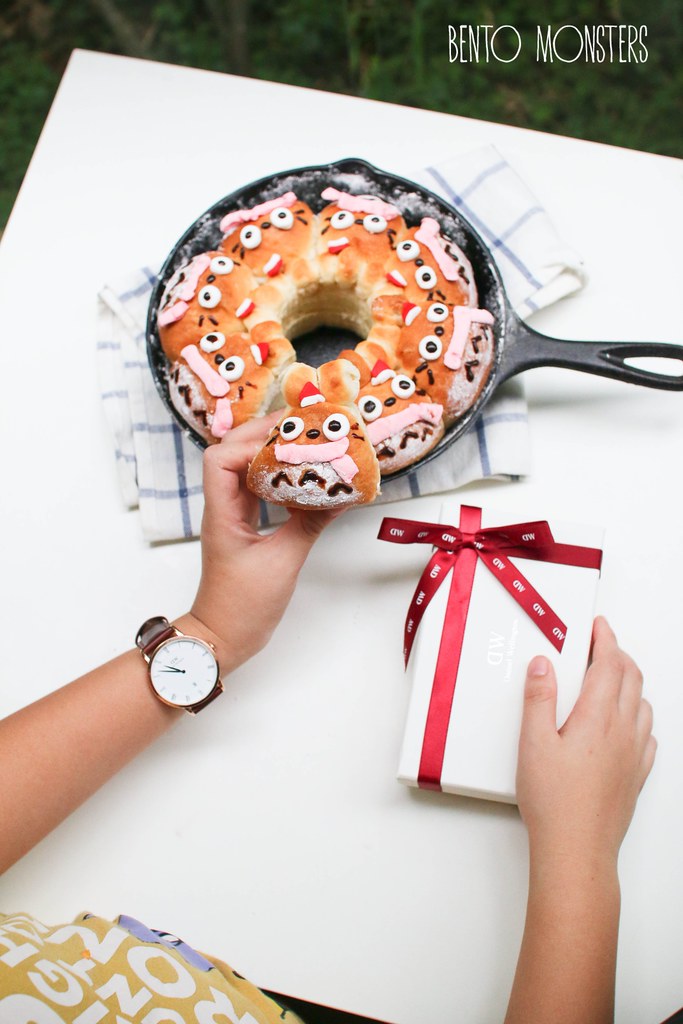
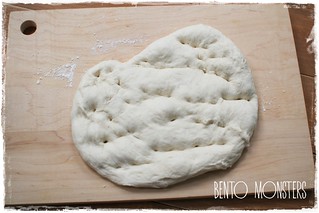
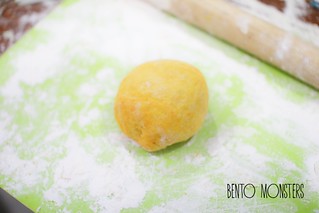
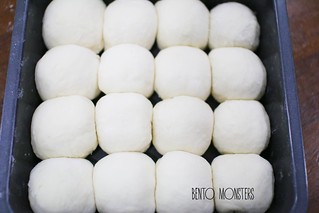
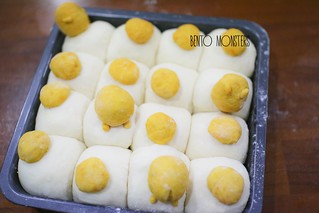
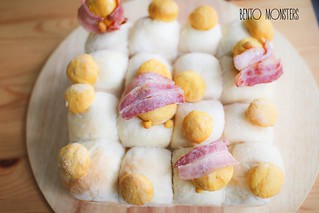
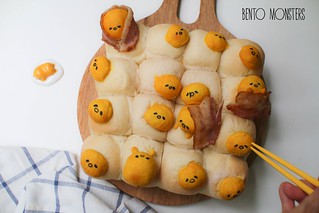
I made a few Baymax Christmas creations this year. First, Baymax chirgiri-pan, made this festive by adding on a scarf and a Santa hat using crabstick and tomatoes. I have the basic recipe to make these, not sure when I'm updating it, I've so many recipes to update. -_-

IMG_8845
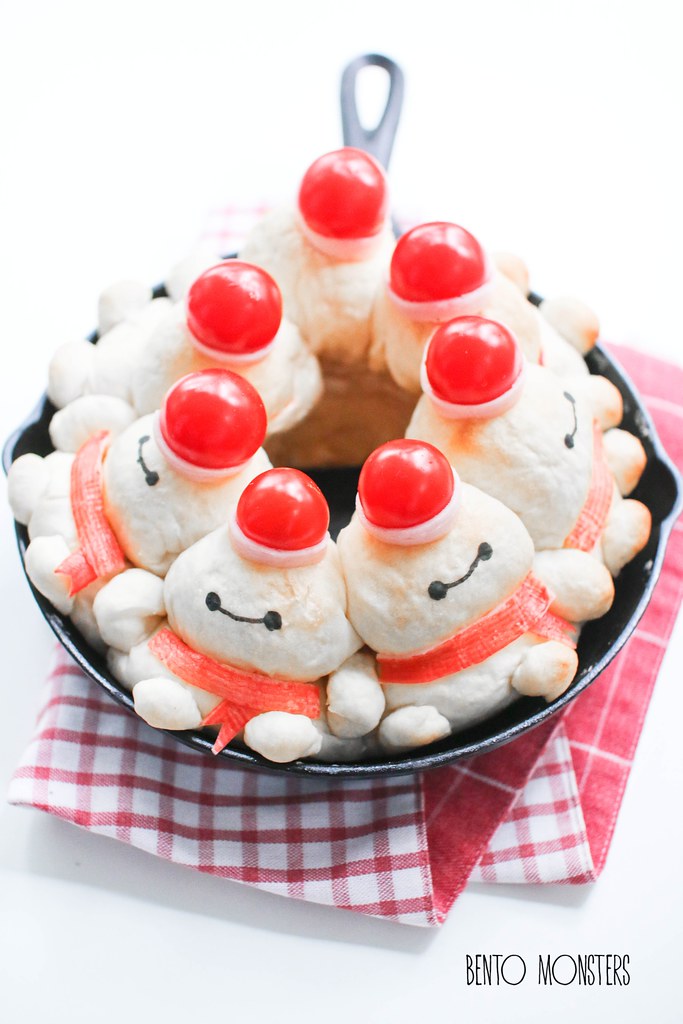
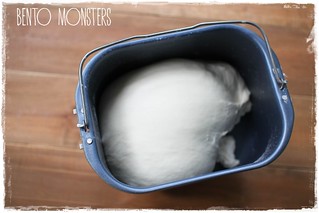
I missed baking chrigiri-pan, my oven broke down before I left for my trip. I think I overworked it before I left, lol. Hoping it can be fixed so I won't have to waste money getting a new oven.

IMG_8855
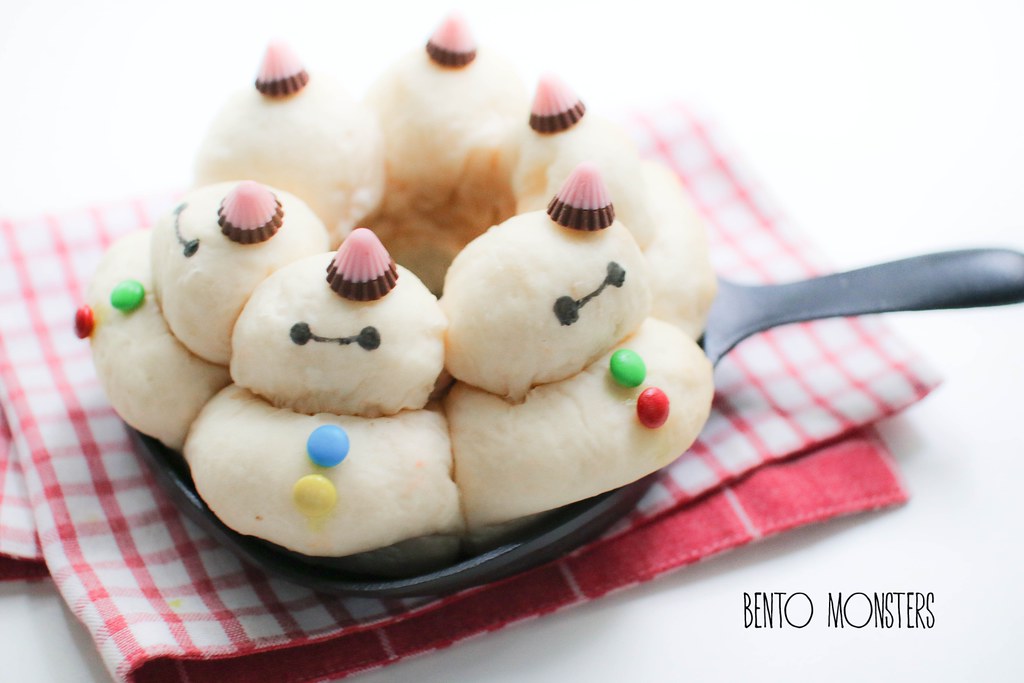
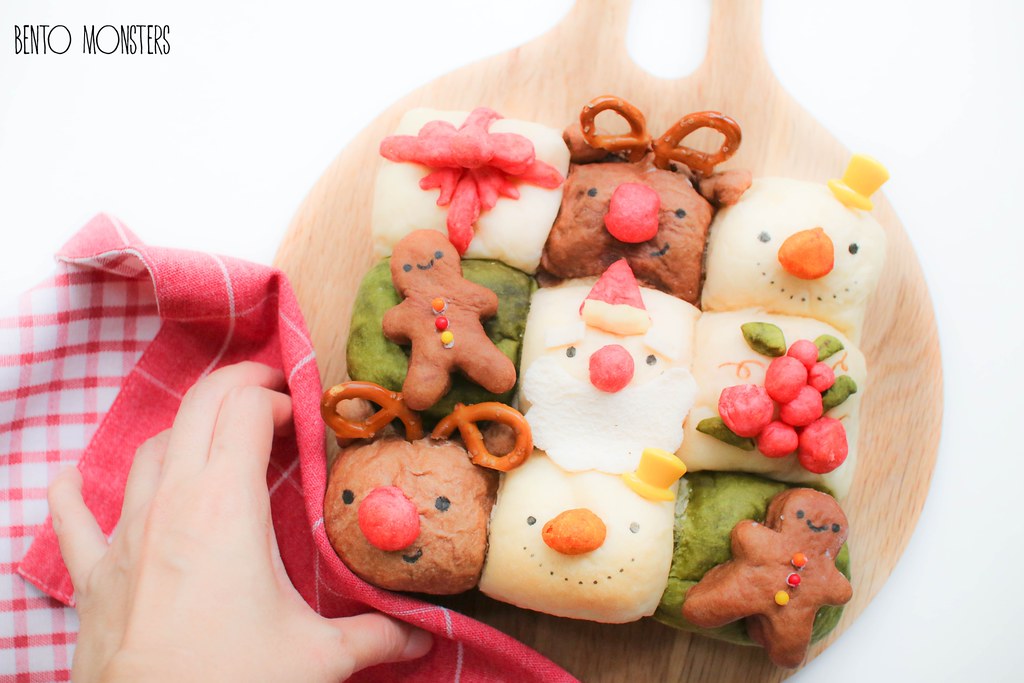
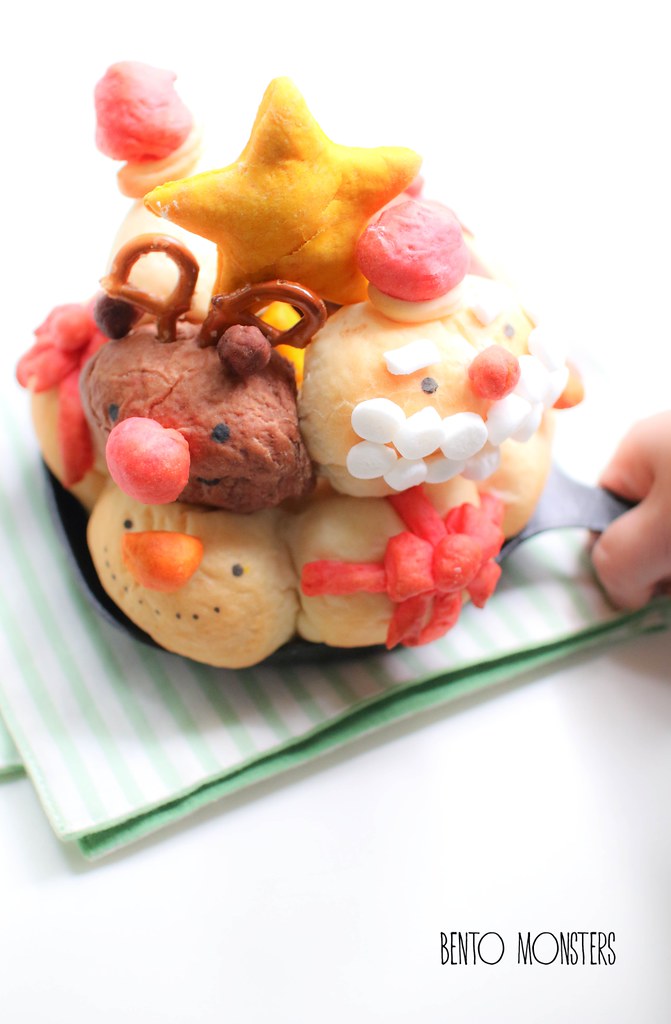
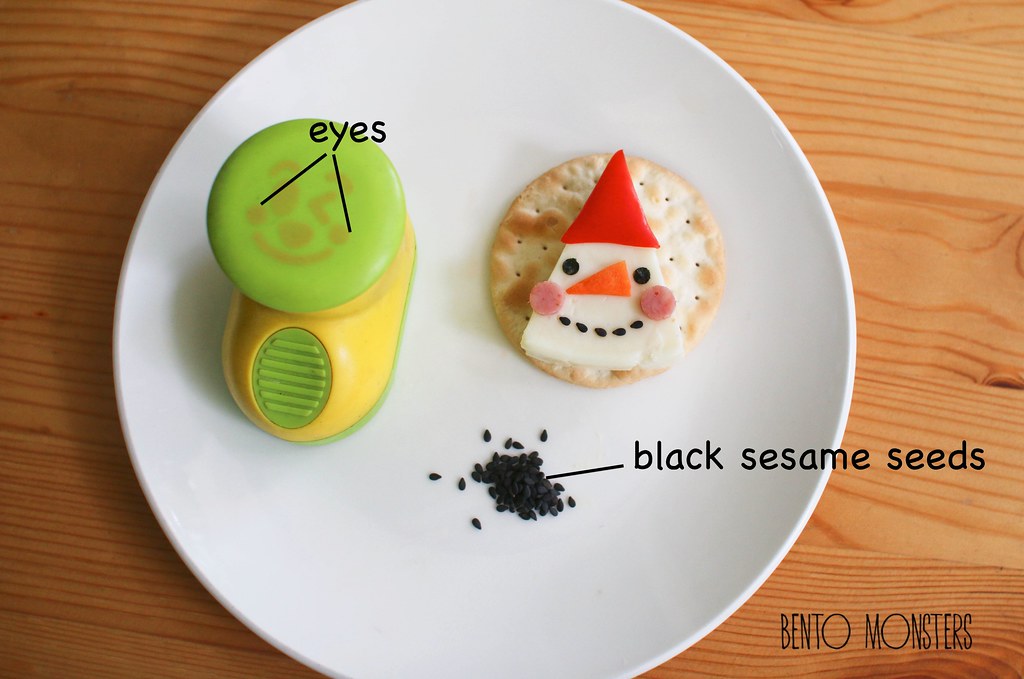
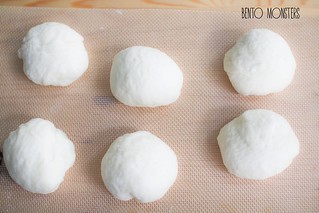
I also made snowman Baymax with my remaining dough. I used chocolates for the hats and M&M's for the buttons.

IMG_8517
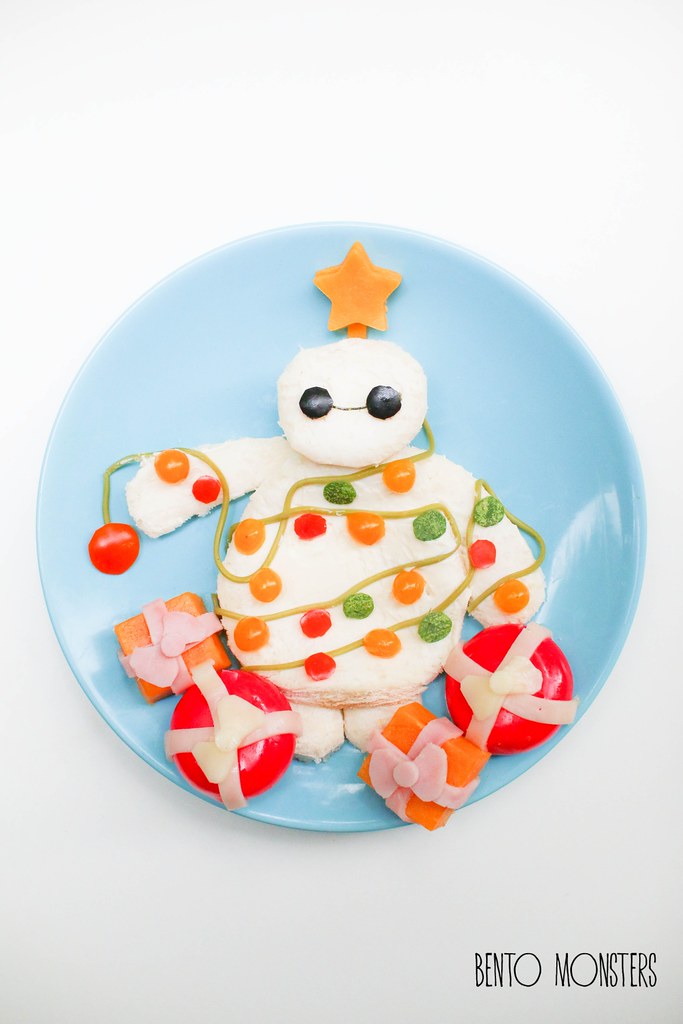
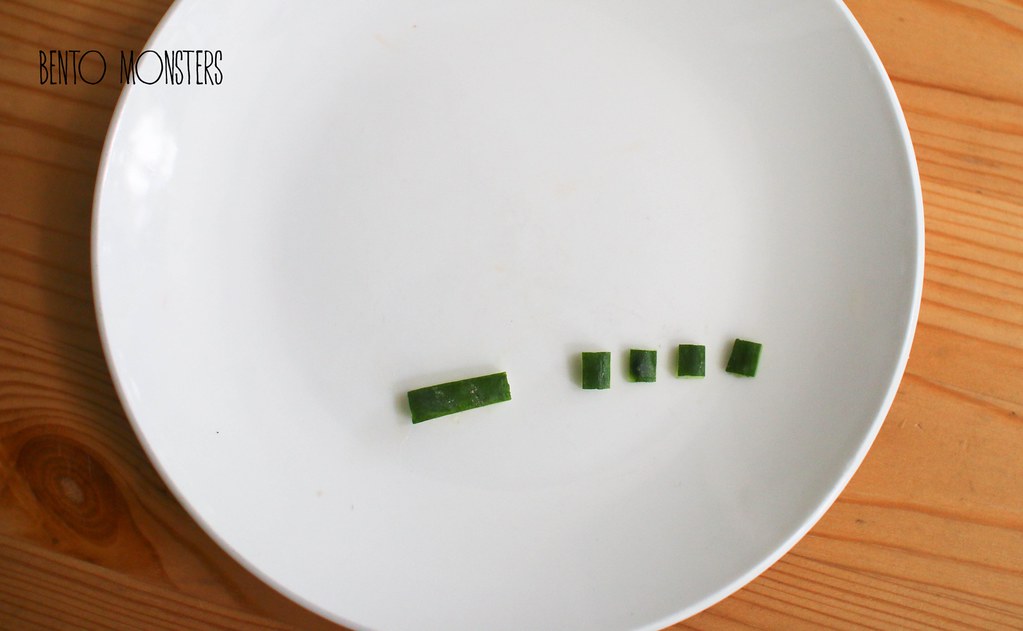
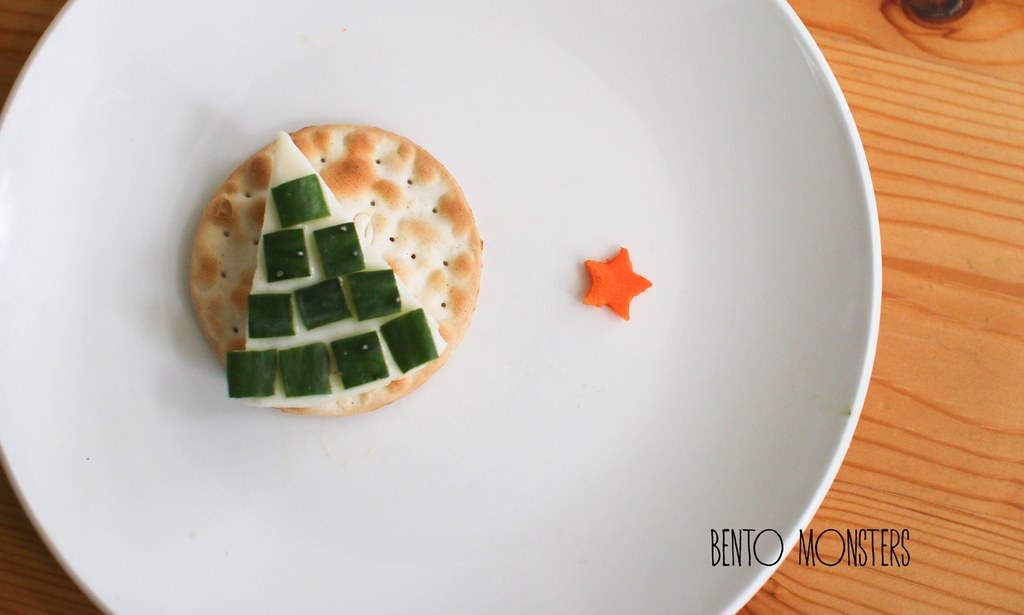
This Baymax Christmas tree was made for We are Fresh Kids digital Advent calendar. Baymax is the Christmas tree here, so the ornaments are hung around him, lol.

IMG_8520
Not sure if I can do another post before the year ends, in case I don't, here's wishing you a Happy New Year in advance. :)

Wednesday 16 December 2015

Christmas Sushi and Bread

Hello from Japan! I had wanted to do up one or two posts to auto-post while I'm on holiday, as I've quite a few Christmas creations to share. However, I was busy right up to the day of departure, so it did not work out the way I had intended. I did managed to get the photos uploaded for this post, planning to type it out if I had any free time on my trip. I finally found some time to update as these few days we are just relaxing and enjoying the snow and onsen, after a hectic and tiring one week of theme park and sightseeing.

IMG_8906
I did not managed to make any Christmas bentos so far, I do have some from past years and you can check them out over here. The first food art I'm sharing today is a set of Christmas sushi.

IMG_8905
I'm quite happy with how they turned out, I've made similar snowman sushi before, and this time, I added in Santa and reindeer as well.

IMG_8907
The sushi are mainly made from rice stuffed into aburaage, details were done using ingredients like cheese, nori, crabstick, Kombu and fish sausages. I've served them on a sushi board but they can be packed for bentos too.

IMG_8709
I also baked Christmas themed chigiri-pan. Chigiri-pan or pull apart bread buns are quite fun to make. For this, I made snowman, Santa, reindeer, reindeer, gingerbread man, present and berries.

IMG_8676
I used cocoa powder and matcha powder for the brown and green respectively. I used food colourings for the rest of the colours. Just stocked up on vegetable powders, will have to try them out when I'm back.

IMG_8713
I know some of you want to recipe for these, but I'm not able to share as I was still experimenting so I did not take down the exact measurements.

IMG_8601
This was actually the first version of the Chrismas bread buns I made, but I was not happy with it. I wanted to attempt it again with some changes, but could not find the time to do so, looks like I will have to try to attempt this next year.

Monday 7 December 2015

Christmas Cheese Wedge

More Christmas food art ideas to share for today's post. This time I'm sharing Christmas themed snacks you can make using The Laughing Cow cheese wedges, these are great for serving on a platter for Christmas parties too.

IMG_8873
I made snowman, Santa, reindeer and Christmas tree using cheese wedges. I took some photos to explain how I craft them and will share them later in this post.

IMG_8868
Which design do you like best? I think mine is the snowman. :)

IMG_1362
I'm sure most of you are familiar with the cheese products from The Laughing Cow. They have a wide range of cheese products, and my boys' favourites are Belcube and Cheez Dippers. They have been snacking on them since they were toddlers and they still love to eat them now.

IMG_8882
From now till 31 December 2015, you can receive a free Happy Bowl with any purchase of two The Laughing Cow® products. The Happy Bowl is made of high-quality, non-toxic plastic and is microwave-friendly. There are 3 colours for collection: red, yellow and green. I've the one in green. You can redeem at supermarket customer service counter. While stocks last.

IMG_8885
Alright, now I'll go through how to create the snowman first. Use knife to cut out triangles for the hat and nose, from bell peppers and carrots respectively. Use a straw or round cutter to cut out circles from ham.

IMG_8886
Place the cut-outs on the cheese wedge. Using a nori punch, cut out circles for eyes from nori. Use black sesame seeds for the mouth.

IMG_8887
For the Chrismas tree, cut out a strip of cucumber first, then cut them into smaller squares or rectangles.

IMG_8888
Cut out a star from carrot using a star cutter, arrange the cut-outs on a slice of cheese wedge.

IMG_8889
For Santa, cut out a triangle from bell pepper using a knife. Use a round cutter or scissors to cut out circles from bell pepper and ham.

IMG_8894
Use a flower cutter to cut out the Santa's beard from cheese.

IMG_8891
Arrange the cut-outs on the cheese wedge. Use a nori punch to cut out nori for the the eyes and mouth.

IMG_8892
Lastly, for reindeer, you will need two pretzels and a round bell pepper, which you can cut out using a round cutter or a pair of scissors.

IMG_8893
Use a nori punch to cut out circles for the eyes from nori.

IMG_8884
You can serve the cheese wedges on crackers, they go really well with them. :)

Sunday 6 December 2015

Totoro Christmas Food Art

Christmas is coming soon, sharing a set of Totoro Christmas creations today. I actually have so many ideas I want to do, but I always have less time for food art during the school holidays as we are out in the afternoon. I've only been making really simple and fast ones or cute bakes, because I can do the bakes at night and photograph them in the morning. I also have not been blogging much, this post has been sitting in my draft folder for more than a week and I'm actually typing this out in the salon using my handphone while I'm doing my hair, lol.

IMG_8568
My second Christmas themed creation using Totoro, the first one is over here. This is actually a simplified version of what I had in mind, I did not have much time to work on this, so I decided to forgo a few details. Maybe I'll remake this again next year with all the elements I had wanted.

IMG_8565
Totoro is made of rice mixed with grinded black sesame, nori, crabstick, cheese, tomato and fried pasta sticks. The side dish was Japanese pork curry.

IMG_8566
The Christmas tree at the back was made of broccoli, carrots, cheese and crabstick. No time to make some presents under the tree, so I placed cherry tomatoes there instead.

IMG_8528
I also made a Totoro chigiri-pan and decorated it into Christmas themed. I baked it in the cast iron skillet in this picture.

IMG_8533
Found this familiar? The basic recipe for this has been shared before on my blog over here. To make this Christmas version, I simply added on a Christmas hat using heart shaped sprinkler and marshmallow and the scarf was cut out from marshmallow.

IMG_8543
I used melted chocolate to stick on the sprinkler. There is no need to use anything to stick on the marshmallow, the cut side of marshmallow is sticky and can stick on by itself.

IMG_8542Here's LT helping me to pose with the Daniel Wellington watch I got for hubby. If you are thinking of getting on for yourself or your loved ones, you can use the discount code "MingXmas" to get 15% off till 15 January 2016. I'm also having a giveaway of a Daniel Wellington watch of your choice on my Instagram account, you can join over here. Good luck!

Monday 30 November 2015

Gudetama Pull-Apart Bread Bun Recipe

I meant to update this last week, but I fell sick again. -_- This time it was a bad cough, had difficulty breathing and could not sleep the entire night, as the breathlessness becomes worse when I lay down. In the end, I gave up and woke up at 4am to iron clothes, very random, lol, there was a huge pile waiting for me to clear anyway, so I thought I might as well make better use of my time since I can't sleep.

I went off to see the doctor after the clinic was open and doctor said it was bronchitis, put me on the nebuliser and sent me home with lots of medicine. Seeing the nebuliser reminded me of my boys when they were babies/toddlers, I remembered carrying my boys and administering it for them and they would always cry without fail. I have never used the nebuliser myself before this, and always wondered why they cried, I guess it was due the noise because there really isn't anything uncomfy about it. And the roles were reversed now, as my hubby instructed my boys to help me hold the mask, I shooed them away after a while because I had no problem handling it myself, lol. I'm a lot better by now, almost recovered,  I don't want to fall sick anymore, my trip is coming soon.

IMG_8113
I know some of you are waiting for this recipe. I'm sorry I took so long with the recipe for these Gudetmama pull-apart bread buns, thank you for your patience. The reason was because I was playing around with a new recipe when I made this, and I needed another round to try and take down the measurements and steps.

IMG_7478
This has got to be one of my favourite pull-apart buns designs, along with the Totoro and Baymax ring ones which I did much earlier.

IMG_7473
The yellow portion is done by mixing in steamed mashed pumpkin. Please choose those with a more yellowish flesh, so the colour of the dough won't turn out too orange.

IMG_7541
The benefit about pull-apart buns is that they stay soft and fresh longer because there is less exposed surface area.

gudetama bread
This lazy egg is just too cute, hope you have fun making him.

GUDETAMA PULL-APART BREAD BUN RECIPE

Ingredients:
500g bread flour
2 tbsp sugar
1 tsp salt
50g butter, at room temperature
1 tsp instant yeast
375g milk
50g steamed mashed pumpkin
8g butter, at room temperature
Pan-fried bacon
Black food marker

Method:
  1. Mix all the ingredients, except butter, in a large bowl to get a dough. Add in butter and knead until dough is springy and soft, this takes around 10 minutes. If you have a bread maker, you can just use the dough function for this step, as well as step 2.
  2. IMG_1925
  3. Cover the dough with cling wrap and keep in a warm place for it to rise. This takes around an hour and the dough should double in size. Do a finger test to check if it's ready.
  4. IMG_1792
  5. Take dough out and punch out the air from the dough with your fist. 
  6. IMG_1794
  7. Cut out around 100g of dough and mix with 50g of steamed mashed pumpkin and 8g of butter. Knead till the colours are even, you can add in a little bread flour if it is too sticky while you are working on it. When it's done, roll it out and form into a ball. Cover with a damp cloth or cling wrap and set aside for 15 minutes. 
  8. IMG_8095
  9. Using the plain dough, roll out the 16 portions of 50g, one at a time and form them into balls. Cover with a damp cloth or cling wrap and set aside for 15 minutes.
  10. IMG_2283
  11. Roll out the white dough of 50g each, one at a time and form them into balls. Grease a 20cm square tin, and place them inside. At this point, there will still be space, as the dough will double in size after proofing. 
  12. IMG_8097
  13. Using the yellow pumpkin dough, shape into 16 Gudetama and place on top of the white dough, use a little water to "stick" if needed.  You can do them in different variations like what  I did. Cover with cling wrap or damp cloth and let the dough proof for 40 minutes. Preheat oven to 190 degrees celcius and turn down to 140 degrees celcius. Place the tray at the middle rack and back for around 15 minutes. After 5 minutes of baking, cover the bread using aluminium foil.
  14. IMG_8101
  15. After the bread has cooled down, place bacon blanket on some of the Gudetama, you can use pasta sticks to secure them if needed. Draw on the features using a black food marker.
  16. IMG_8103 IMG_7473

Sunday 22 November 2015

Inside out Bing Bong & Joy

A little overdue in posting this on my blog. After we caught the movie Inside out, the character that left the most impression on me was not any of Ripley's emotions, but Bing Bong. Bing Bong is an imaginary friend of Ripley, he sacrificed himself in the end, I know it's very typical Disney movie style but I still could not help crying.

IMG_6766
There you go, Bing Bong bento I made after I watched the movie. I had made the emotions Sadness and Anger before I caught the movie, they can be found here.

IMG_6744 Bing Bong was made using rice coloured with pink sushi seasoning. Other ingredients used were cheese, ham, nori, lettuce and red cabbage. I used a hat cupcake topper on him.

IMG_6757
Also packed a fast chicken and bell peppers stir fry and tamagoyaki in this bento.

IMG_8420
I also made the emotion Joy, which I don't really like, I find her rather useless and selfish towards the end,lol. The emotions I liked best was Sadness, she was a little irritating at first, but I still find her cute and I liked how she was able to empathise for others.

IMG_8416
I'm not too happy with how Joy turned out though, I know it does not really resembles her, was rushing that day and don't have time to alter. I don't think I will be remaking this again though.

IMG_8421
Ingredients used to make Joy were rice(coloured with some ketchup), somen and ham dyed blue in butterfly/blue pea flower water cheese and tomatoes.