Thursday 28 November 2013

Strawberry Cheesecake in a Jar

It was my birthday last Sunday, my boys wanted to bake me a cake last Friday as we are hardly at home on weekends. I decided on a no bake strawberry cheesecake, something really easy, so they can manage. I'm sharing the recipe as some of you have requested for it, you can scroll down to the end of this post for it.

IMG_0025
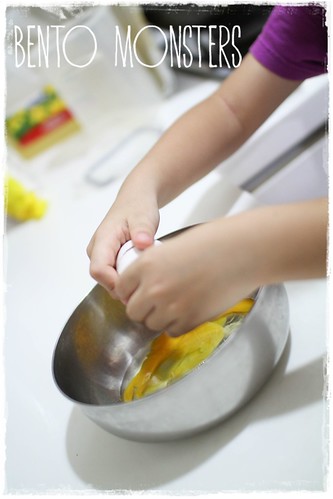
This was the cake they made, they did almost all the work. I only helped them to prepare the strawberry sauce.

IMG_0001
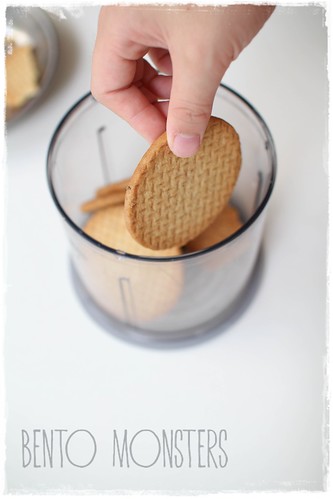
They kept eating the digestive biscuits as they were grinding them. -_-

IMG_0023
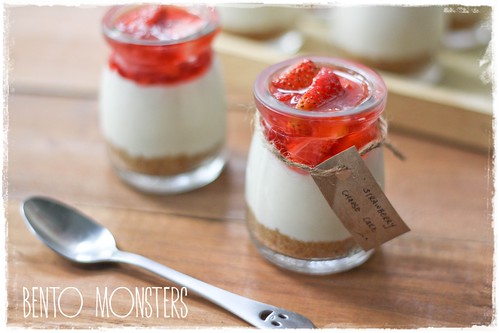
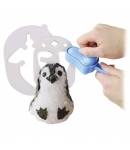
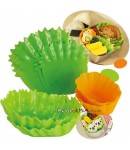
They did make a mess filling in the jar, so I had to clean up the jars before they could top up the strawberry sauce.

IMG_0024
However, after they were done, they were shocked to learn that this was my birthday cake. They said this does not look like a birthday cake at all, they wanted to bake a cake filled with whipped cream and strawberry. -_-

IMG_0032
They ended up baking another cake that night. :P

IMG_0047
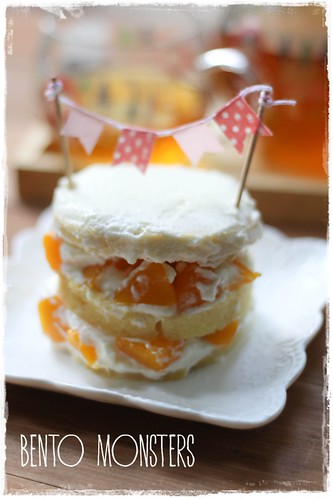
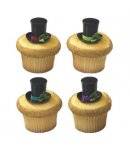
I did not have any strawberries left, so they filled the cake with peaches instead. The bunting was done by me, I added it on the following day. :)

IMG_0112
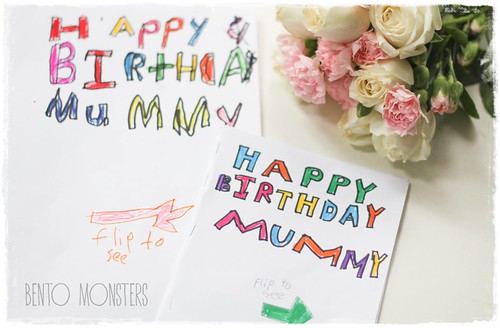
My birthday cards and flowers from my boys. They drew identical cards this year, lol.

IMG_0098
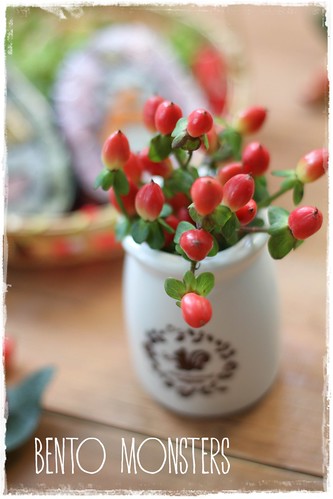
Yay, they bought me more flowers this year. :)

STRAWBERRY CHEESECAKE JARS

Ingredients:
150g strawberries, chopped
3 tbsp sugar
75g digestive biscuit
25g unsalted butter
250g cream cheese, soften at room temperature
50g icing sugar
140g low fat yoghurt
1 tsp vanilla essence

Method:
  1. Heat about 1/2 of the strawberries with castor sugar in a pan over medium heat till all the strawberries have broken down. Add the rest of the strawberries and cook for 1 minute. Set aside to cool.
  2. Crumb digestive biscuit using a blender.
  3. Melt butter in a microwave or over a pan. Mix butter with digestive biscuits crumbs. Spoon the mixture equally into 6 small pudding jars. Lightly press down. Chill in fridge.
  4. Blend cream cheese, icing sugar and vanilla essence using a blender till smooth and creamy, around 3 minutes.
  5. Add in yoghurt and continue to blend for another minute. Spoon mixture equally into the jars and leave to chill in fridge.
  6. Top with strawberry sauce and serve. 

Wednesday 27 November 2013

Santa & Snowman Christmas Sushi

Christmas is around a month away, have you started making any Christmas themed food yet? I started on Christmas themed food just before the school holidays started, as I will be away for the first two weeks of December. I still have so many more ideas I want to try but I'm running out of time. I hope I have time to make them after I return from my trip.  If you need more ideas, you can click HERE to check out all my past Christmas foodart. :)

IMG_9884
I got this santa sushi idea from a decor sushi book. Snowman sushi idea was from a Japan site. There was no instructions for the snowman sushi but it did not look too difficult, so I went ahead to try. It's not perfect but I think it did not turn out too bad either.

IMG_9877The pink coloured rice was coloured using sakura denbu, green rice was with deco furi and orange rice was mixed with steamed pumpkin.

IMG_9908
LT wanted to bring the sushi to school, so I packed one in his bento box, along with gyozas.

IMG_9893
Found a picture of these lovely flowers in my camera, so I thought I'll upload it as well. :)
Bunting---Dots-and-Stripes---Rainbow---13
Where to get same or similar items used in today's post:

Tuesday 26 November 2013

Spam Pig Pita Bento

I seemed to have lost my blogging mojo these days. I'm still making cute food, but I have been rather unmotivated to blog about them. -_-

IMG_9643
I made these pitas for my boy's lunch just before the school holidays. I filled half the pitas with minced beef and the other half with spam, and lightly toasted them before serving.

IMG_9646
I did a quick decor using spam, turned it into two piggies. Do the piggies look like they are sleeping in a sleeping bag?

IMG_9649
This piggy looks like he's peeping out to say hello. :p
Bunting---Dots-and-Stripes---Rainbow---11
Where to get same or similar items used in today's post:

Thursday 21 November 2013

Christmas Penguin & Lunchbox Love

Around a week ago, the people from Say Please kindly sent over a few sets of Lunchbox Love notes for my boys.

IMG_9897\
Lunchbox Love are just perfect for adding a little love in your child's lunchbox. Each card comes with a positive note in front and a fun trivia behind. Each set or volume contains 12 cards, they have lots of volumes available, so you do not have to worry about variety. My boys were super excited to see these cards, I had to stop them from reading all the cards. lol. I can't wait to include a card with their bento to school next year.

IMG_9900
Lunchbox Love notes also have seasonal sets for Christmas and Valentine's Day. How fun is that!

IMG_9862
Since it is school holiday, I made an early Christmas lunch for my boys at home and included some Christmas Lunchbox Love notes for them. :)

IMG_9860
In this lunch, I made penguin onigiris, grilled wings, grilled salmon. I packed them together with lettuce and fruits. :)


IMG_9851
These penguins were inspired by a penguin rice mould set I saw online, the set can cut out nori as well. I included the link below, check it out if you are interested. :)
Bunting---Dots-and-Stripes---Rainbow---11
Where to get same or similar items used in today's post:

Wednesday 20 November 2013

Cinnamoroll Somen

I've been rather busy even though it's school holidays. We have been going out in the afternoon, so it's a mad rush for me to clear housework and cook dinner once we get back home. -_-

IMG_9620
It has been a long time since I last made Cinnamoroll. This time, I made him using somen. :)This is quite easy to make, you can refer to the tutorial I did for My Melody somen if you are interested. I served the somen with a cold dipping sauce and a side dish chicken cutlets.

IMG_9623
LT used to love Cinnamoroll, I even bought him a soft toy to hug in the car. :)
Bunting---Dots-and-Stripes---Rainbow---11
Where to get same or similar items used in today's post:

Tuesday 19 November 2013

Animal Palz Pocket Sandwich

LT had a class party on his last day of school last week. It also marks the end of his kindergarten, as he will be moving on to primary school next year. It was a potluck party and the kids were asked to bring along food to share.

IMG_9920
I decided to pack mini bentos for LT and his friends. I woke up early that day to get these ready.

IMG_9914
Thanks to my Animal Palz, it was a breeze making these cute pocket sandwiches.

IMG_9912
I added in some fried chicken for the kids too. LT insisted everyone gets a panda pocket sandwich, as it's his favourite in the set.

IMG_9940
I had quite a lot of leftover bread after making the pocket sandwiches, so I made breadcrumbs with them. I am sharing the recipe at the end of this post.

I often get questions asking me what I do with leftover bento food cut outs, I actually wrote a post 2 years back on what I do with them. You can check out the post HERE. I will try to update that post with more recipes for leftover bread in future.

IMG_9937
I made a pork cutlet using my homemade breadcrumbs last week. :)

HOMEMADE BREADCRUMBS

Ingredients:
Slices of stale bread, bread trimmings and/or bread crusts.

Method:
  1. Cut your bread into thin strips. 
  2. Lay them on an oven tray and toast at 130 degrees celsius for around 15 minutes, or till the bread are dry. Do not brown them.
  3. Grind them in a blender till fine.
  4. When they are completely cool, you can store them in a zip lock bag in the fridge. You can store them in the freezer if you want to keep them longer.
Bunting---Dots-and-Stripes---Rainbow---13
Where to get same or similar item used in today's post: