Monday 28 September 2015

Totoro Soba & Puff Pastry Soup

This is the second time I'm making Totoro Soba. My first one was made in 2013, inspired by the Totoro soba that went viral online. After that, I went on to use noodles to make many different food art. This time, I'm remaking Totoro again using my homemade black sesame noodles.

IMG_1040
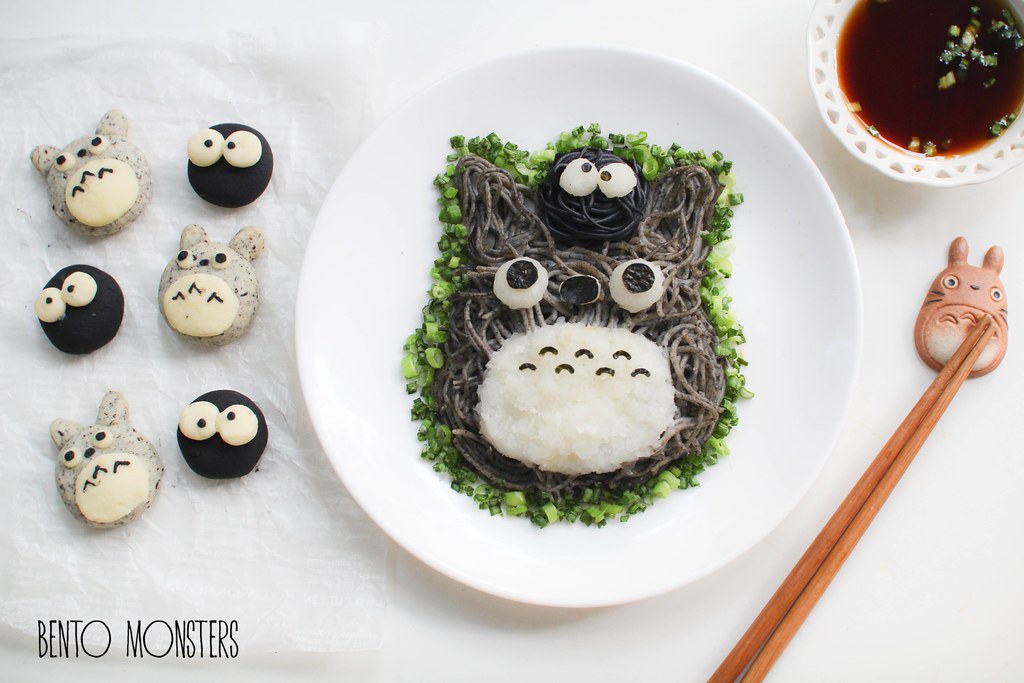
My black sesame noodles recipe probably need a little tweaking, added a little too much black sesame and the noodles broke quite easily. Susuwatari, the black soot on Totoro's head was made from charcoal noodles, a little goes a long way when using charcoal, very little is needed to colour the noodles black.

IMG_1021
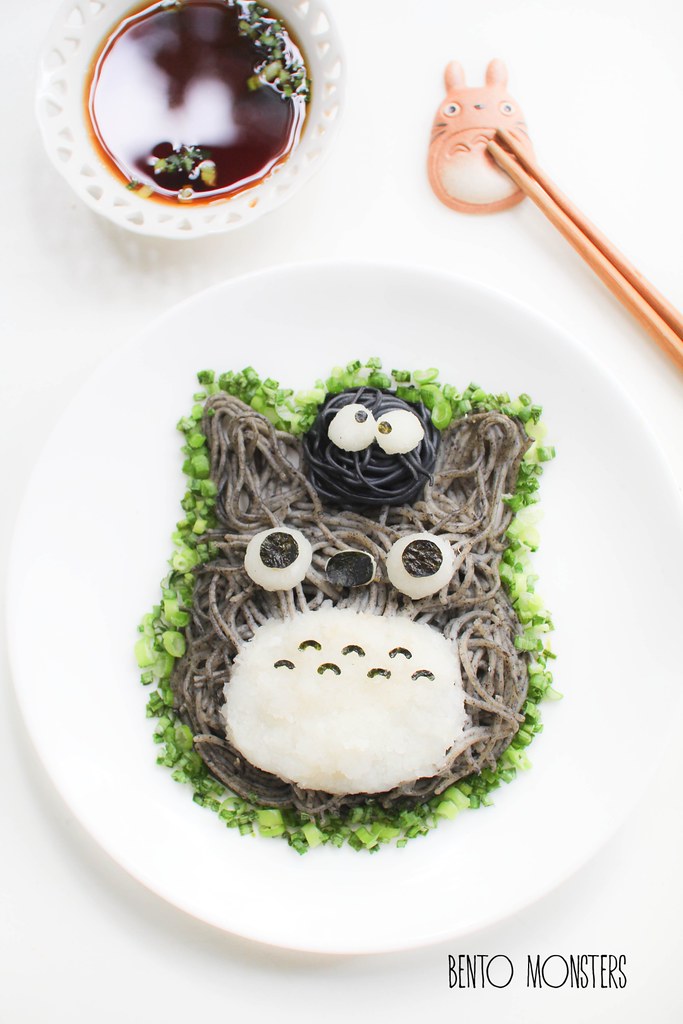
Other ingredients used to make this were grated daikon and nori. Noodles were served cold with a soy sauce based dipping sauce, very refreshing for the hot weather.

IMG_1036
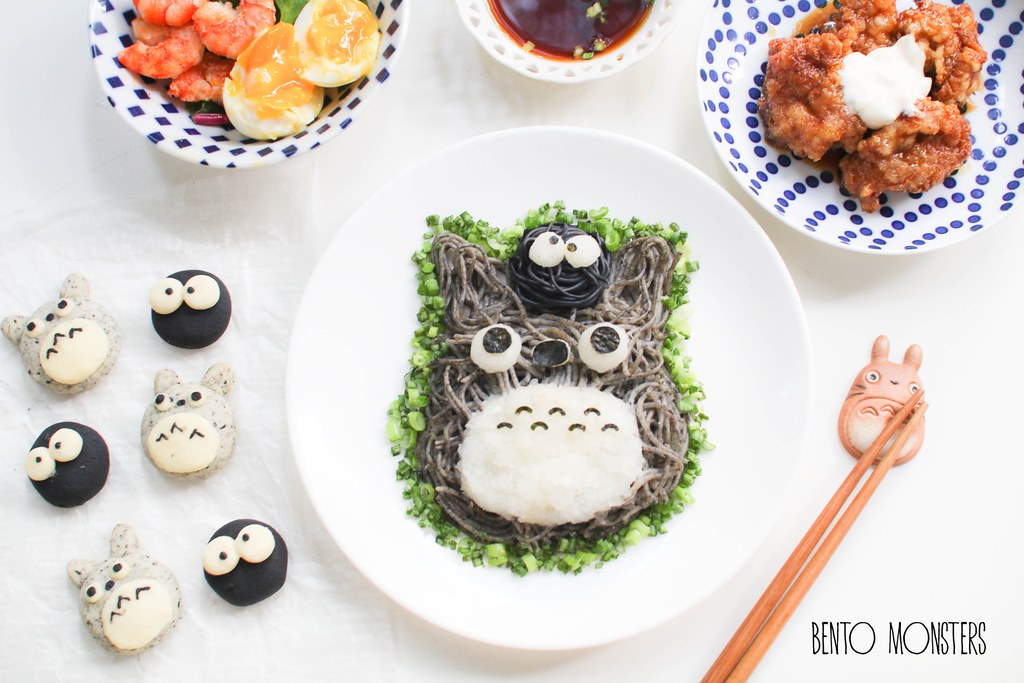
The cookies at the side are made from black sesame and charcoal as well, I'll leave the update and recipe for them for another post next time.

IMG_1574
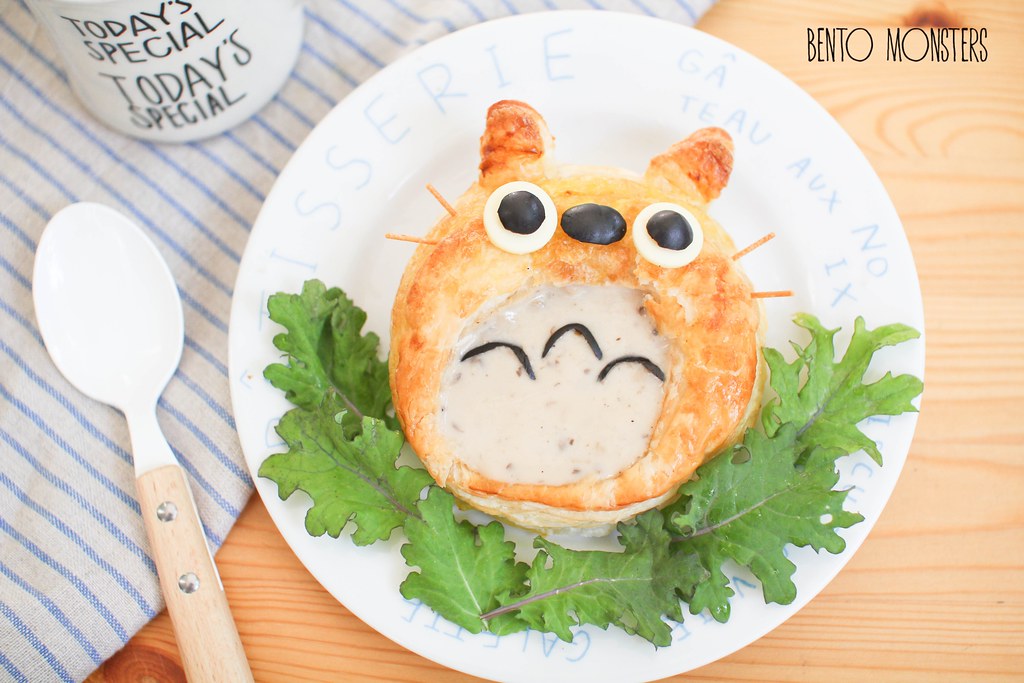
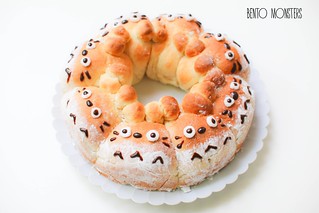
This is a puff pastry Totoro soup bowl filled with mushroom soup. I used ready made puff pastry sheets for this so it was quite easy.

IMG_1578
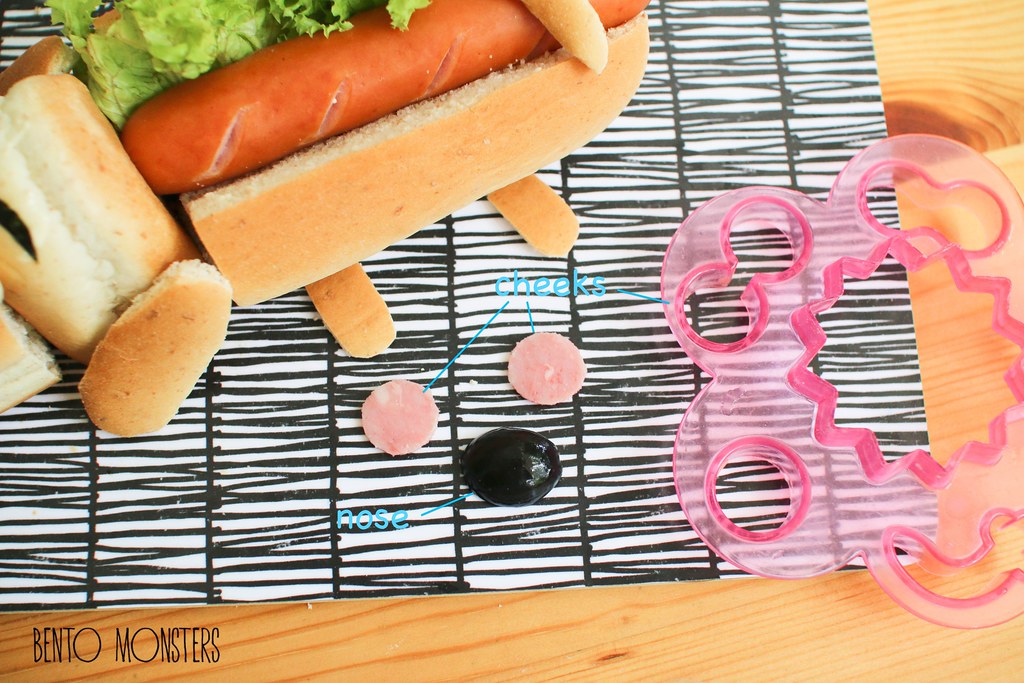
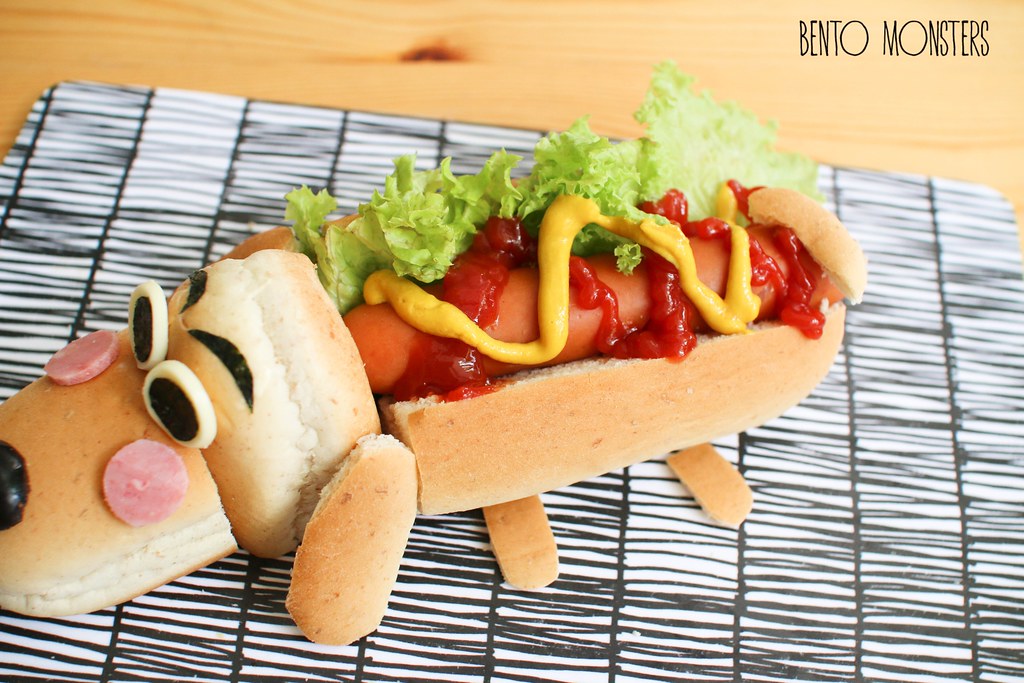
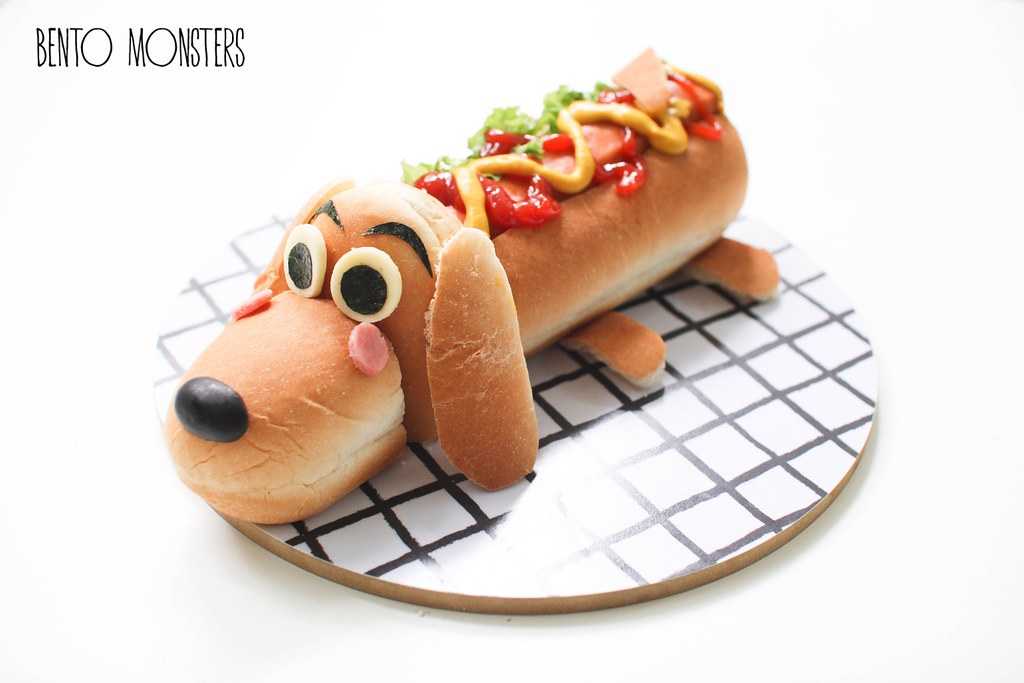
Other ingredients used were cheese, olives and fried pasta.

IMG_1587
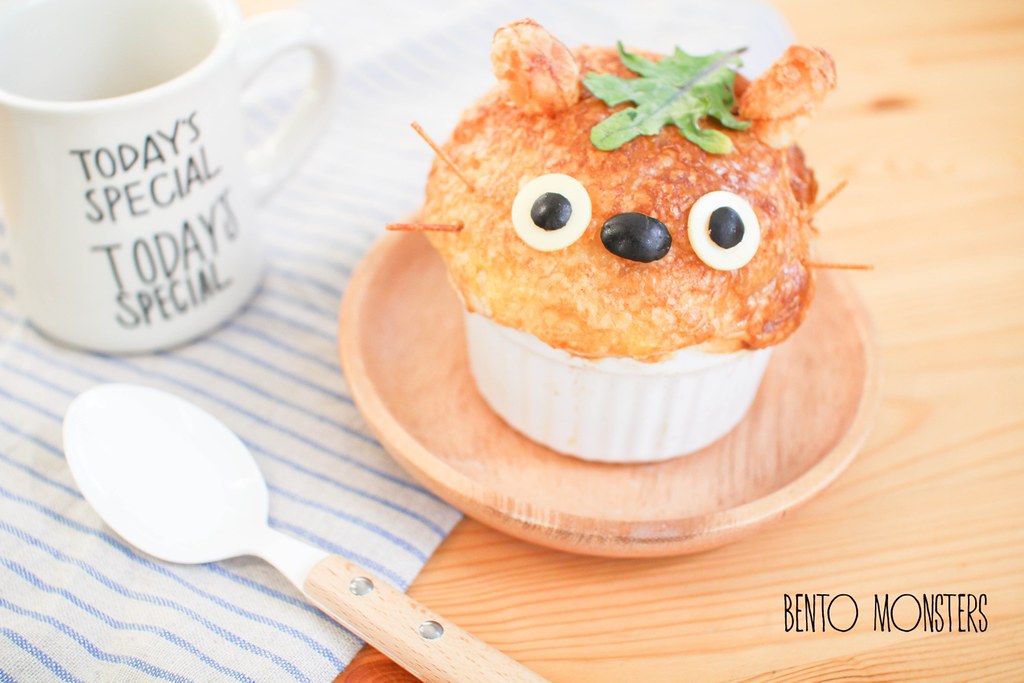
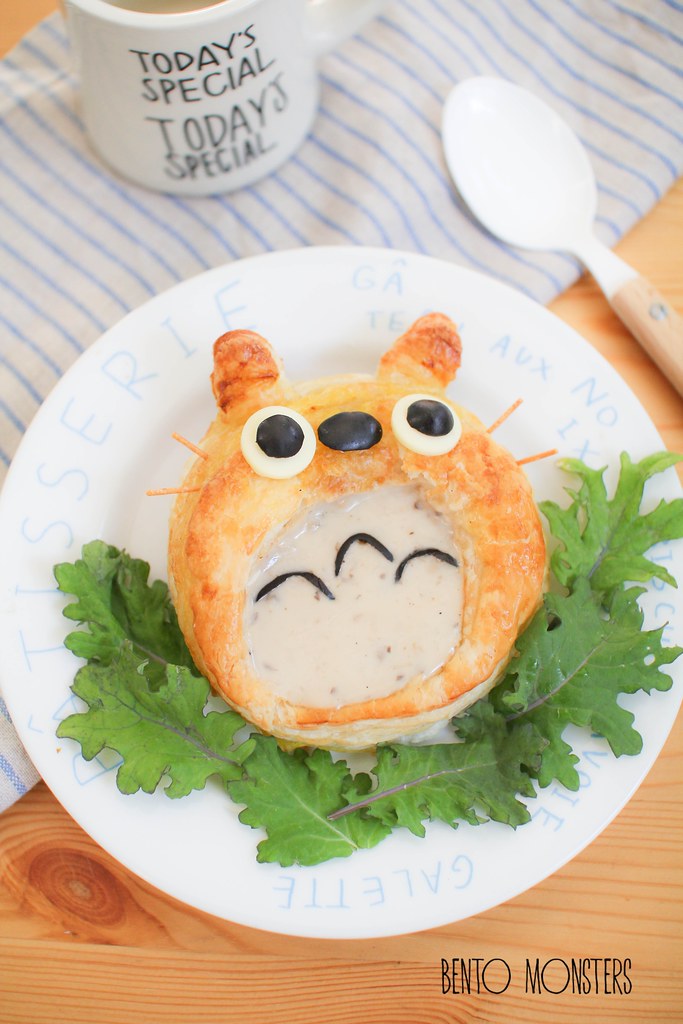
This is another version of the puff pastry soup, did not quite liked how it turned out though. The soup was in the ramekin for this and I covered up the ramekin with a puff pastry on top.

Sunday 27 September 2015

Quail Egg Pig & Cow Pasta

School was closed due to the haze on friday, had a good long weekend, caught up a little on my sleep, yay. My boys are hoping the haze will be back again today so that they don't have to go to school tomorrow. After checking the pollutant index a couple of times since this afternoon, they are finally convinced it's not going to happen, lol.

IMG_5383
Now that they are off to bed, thought I'll finish off this post in my draft folder before I sleep. Quail eggs are a quick way to decorate your food, you can make them into various animals and even some cartoon characters. One of my favourite thing to make out of quail eggs are piggies.

IMG_5384
One quail egg makes one piggy, I cut the quail egg in half, that way I won't end up with too many quail eggs in the bowl. The pink portion is Japanese fish sausage, you can substitute with ham if you can't find it. The blanky one of the piggy is holding is a blanch red cabbage.

IMG_5381
The piggies are lying on Mentaiko pasta, one of our favourite Japanese fusion pasta. I've shared the recipe here on my blog before. I've also added some Ikura, which my boys like as well.

IMG_2000
Another version of quail egg piggy, this time I soaked the egg in beetroot water to get the nice pink colour. I also made a quail egg cow. The extra cutouts for their nose and ears were actually sliced out from the back of the quail egg, which means that the back part is actually not presentable, lol.

IMG_2005
This time, the animals were lying on pasta bolognese, added in asparagus, carrots and lettuce to make it a more complete meal.

IMG_2015
Served the meal with some infused water which IT likes, but LT hates. LT says he prefers plain water, no lemons in his please.

Thursday 24 September 2015

Gudetama, Pooh & Tigger Mooncakes

Thankful for a much needed public holiday today where I can wake up later. I was feeling really tired these few days, having insomnia and can't really sleep at the time I'm supposed to, ended up having to drag myself out of bed every morning. :( The haze is terrible today, we were planning to bring the boys outdoor, but it was so bad, we ended up at home most of the day and just head out for meals at the malls instead.

IMG_6877
Ah, I just realised Mid-Autumn festival is on this sunday. I kept having the impression that it's still quite far away. -_- So, I guess I'll just share all the rest of my snowskin creations in this post, instead of splitting them up. Sorry for putting them up so late. First one I'm sharing is Gudetama snowskin mooncake, this is also another easy character like the Baymax one I shared earlier.

IMG_6875
I used passion fruit paste for the fillings and wrapped it around champagne truffle.

IMG_6878
I should have done this earlier, love the addition of truffles.

IMG_5988
This was another version of Gudetama I made earlier, this one was filled with royal milk tea paste.

IMG_5991
Gudetama is now one of my favourite character to make.

IMG_5931
Yet another snowskin mooncake design I made, Tsum Tsum Pooh and Tigger.  Pooh one is easy but Tigger is a little more work.

IMG_5955
It was quite fun making these mooncakes, that will be all for this year, will be back again next year with new designs, lol. :)

Tuesday 22 September 2015

Hotel Transylvania 2 Food Art

It's that time of the year for making Halloween bentos again. I've made many Halloween bentos during the past few years, you can check out all my past creations over here. I probably won't be making that many this year, as I'm don't blog that often like I used to these days, and I am afraid I won't be able to update in time if I make too many.

My first Halloween creation for this year is about the upcoming movie Hotel Transylvania 2. I'm joining a Hotel Transylvania 2 blog hop with my fellow bento friends, so please remember to click on the graphic at the end of the post for more Hotel Transylavania 2 inspired lunches.
IMG_6777
I love the new character in Transylvnia 2, Dennis, the son of Johnny and Mavis. Dennis looks so cute in the trailer, so of course I chose to craft him. I made his grandpa, Dracula too, because I like the posters showing both of them together.

IMG_6800
This is actually lunch for two, LT ate the Dracula rice with with his soup, and IT gets to eat his soup with Dennis pasta(There's another bowl of soup not in the picture.). IT likes to eat pasta and LT likes to eat rice. They don't usually get to choose at home, so both would just eat whatever I serve on the table. The soup is chicken vegetable soup which went well with both rice and pasta.

IMG_6783
To make Dracula, I used rice(coloured with ketchup), nori, cheese, ham(coloured blue by soaking in butterfly/blue pea water) and red cabbage.

IMG_6786
To make Dennis, I used spiral pasta (cooked in tomato based sauce), ham (eye portion was coloured blue using butterfly/blue pea flower waer), cheese and nori. I think Dennis still looks like he can do with more hair, I should have added on more pasta, lol.

Now, are you ready for more spooky lunch ideas, just click on the graphic above, and hop over to Bunches O Lunches, and see what awesome lunch ideas Shannon has for you. :)

Friday 18 September 2015

Totoro & Brown Bear Pull-Apart Bread

Pull-apart bread buns are called chigiri pan in Japan. Chigiri pan made into various characters are all the rage in Japan recently. I first saw them on various Japanese accounts on Instagram a couple of months ago, and they immediately went into my to-do list. I first tried making them around four months back (my memory isn't that fantastic, I checked my Instagram to see when I first posted the buns, lol), but I was not too satisfied with how they turned out. I attempted them again recently and I'm happy with them this time, so I've updated the recipe in this post. :)

IMG_6136
And it's no surprise that the character I choose for my bread bun is my favourite Totoro. The bread recipe is nothing new though, I used a recipe I shared on the blog before. This recipe is a keeper for me, it's really straight forward but the bread still remains soft the following day.

IMG_6150
I used marshmallow for their eyes here, I only realised I was out of icing and white chocolate until it was time to decorate the bread buns. -_- I was searching for something I could use and found some mini marshmallows. They actually turned out quite well and compliments the icing sugar I used for Totoro's tummy. However, if you prefer, icing and white chocolate will work too.

IMG_6128
Makes me happy just looking at so many of Totoros, but I'm bias towards anything Totoro.

IMG_2350
Thought I'll share this earlier attempt of mine too, this was my first attempt at making pull-apart buns in a ring. I decorated them into Brown bear from line. I was not happy with these, so I won't be updating the recipe, but I'm sure you can figure out how to make this and other similar characters using the recipe I'm sharing for Totoro.

IMG_6081
Sorry, one more Totoro related photo to share. Totoro marshmallow on top of my latte. Isn't it cute? Drank this while I was updating my blog.

totorobread
Alright, back to the Totoro bread recipe. I used a chiffon tin to make the bread buns, but it's not a must. You can substitute it with a round pan, and place a small ramekin in the middle too.

TOTORO PULL APART BREAD BUN RECIPE

Ingredients:
Bread Dough:
250g bread flour
30g sugar
1/4 tsp salt
25g butter, at room temperature
1 tsp instant yeast
1/2 beaten egg (keep the reminder 1/2 egg for egg wash)
120g water
Icing sugar
Mini marshmallows
Melted chocolate

Method:
  1. Mix all the ingredients, except butter, in a large bowl to get a dough. Add in butter and knead until dough is springy and soft, this takes around 10 minutes. If you have a bread maker, you can just use the dough function for this step, as well as step 2.
  2. IMG_1925
  3. Cover the dough with cling wrap and keep in a warm place for it to rise. This takes around an hour and the dough should double in size. Do a finger test to check if it's ready.
  4. IMG_1792
  5. Take dough out and punch out the air from the dough with your fist. 
  6. IMG_1794
  7. Divide the dough into 9 portions, 8 portions will be used for the Totoro's body and the last portion is used for making all of Totoro's ears. You can weigh them out if you like. I weighed out 8 portions of around 57g and just combine whatever is left for the last portion. Roll them out and form them into balls. Cover with cling wrap and let the dough rest for 15 minutes.
  8. IMG_5629
  9. Roll out the 8 portions, one at a time and form them into balls. Grease the pan and place them round in a 21cm chiffon tin. At this point, there will still be space, as the dough will double in size after proofing. Pinch off dough from the last portion and shape into ears for Totoro. Cover with cling wrap and let the dough proof for 40 minutes.
  10. IMG_6105 IMG_6111
  11. Brush with egg wash and bake at 180 degrees celcius for around 15 minutes or till they turn golden brown. I did not brush with egg wash for mine.
  12. IMG_6115
  13. After the bread has cooled down, spread on icing sugar for Totoro's tummies. I used a brush to brush on the icing sugar. Using a mini marshmallow, cut off both ends and stick onto the bread. After cutting, the cut side of the marshmallow is sticky and can stick onto the bread. Alternatively, you can also use icing or white chocolate for the eyes and tummies, if you prefer.
  14. IMG_6118
  15. Pipe on the rest of the details using melted chocolate.
  16. IMG_6122

Tuesday 15 September 2015

Paper Doll Sandwich

Have you played with paper dolls before? Paper dolls, as the name implies, are made out of paper, and comes with different clothes and accessories for you to play around. It's one of my favourite thing to play with when I was young, I remember spending part of my pocket money buying them from school bookstore then. Do they still sell them now? I have not seen them around, but I've not actually search for them.

IMG_4420
This sandwich that I am sharing today, is inspired by the paper dolls I love to play with as a child. The gal is actually a ham, cheese and cucumber sandwich, there's a slice of bread under the ham. I made her outfits and accessories out of ham, cheese, carrot, apple and bow pasta.

IMG_4424
I shared this with LT for snack time in the morning, IT was at school then. We dressed the gal up in a few outfits, before we ate her, lol.

IMG_4430
The first outfit we put on her.

IMG_4433
This second one reminds me of Aladdin, lol.

IMG_4437
I like this outfit the best.

IMG_4439
The last outfit we put on her, I think she looks a little like a fairy in this. 

Sunday 13 September 2015

Roald Dahl Matilda Food Art

It has been a long time since I last took part in a bento hop with my fellow Bento Bloggers & Friends. For the benefit of those who are new to this, a bento hop is when a group of bento bloggers get together and create certain thematic lunches. Then we schedule to post them at the same time on our individual blogs and include a hop button. Readers can simply move and hop from one blog to the next to see all the lunches by clicking on the hop button. It's a great way for you to get many ideas related to a certain theme.

IMG_6316
This is the third time I'm taking part in a Roald Dahl themed bento hop. You can check out my creations from previous years here. This year, I decided to make Matilda. Matilda is my second favourite book by Roald Dahl, my favourite is Charlie and the Chocolate Factory. We own a couple of Roald Dahl's books but not Matilda. The boys didn't want me to buy the book simply because it's about a girl. But they did read a copy of the book, which I borrowed from the library a few years ago.

IMG_6318
This Mathilda food art was made out of ham and cheese wrap. The coloured wraps were soy wraps made from spinach, carrot and turmeric, the wraps were filled with ham and cheese. Mathilda's hair was made out of a toasted wrap and I used red cabbage for her dress.

IMG_6315
I made this just before I took a one week bento break, as my boys were having their school holidays. I've to confess I was not happy with how this turned out, I can't really pin-point what is wrong, it's just different from what I had visualize. I was contemplating whether I should drop out of the bento hop as I would not be able to rush out another one in time. But in the end, I decided to still share it, since I already made it.


Now, are you ready for more Roald Dahl lunches? Just click on the picture above, hop over to Keitha's Chaos, and check out her awesome Roald Dahl lunches. :)

Friday 11 September 2015

Hot Dog Bread Bun

I'm staying up to wait for the results of our General Elections today, very happy with the sample vote counts results so far. What I've been seeing on social media the past week got me a little worried about this year's election results but looks like what's popular on social media is not what's popular at the ballot box, the sample vote counts look very promising so far. :) Since I'm sleeping late, I might as well update my blog with a tutorial post. But before that, I would like to thank all of you who have purchased a copy of my bento book and I hope you like it. My bento book just came out on the 8th of September in U.S.,  I've not seen the actual book yet, still waiting for my copies to arrive. For those who are interested to know more about my bento book, you can see my post here for more information, as well as a list of sites to purchase it.

IMG_5098
Okay, back to the food art I'm sharing today, a hotDog literally, lol. I like how it turned out and my boys thought this was quite funny.

IMG_5116
My boys love hot dog buns, IT loves his with ketchup and mustard, while LT just wants lots of ketchup on his. They are always happy to see this on the menu, but sausage isn't healthy, so I do try not to let them eat this often.

hotdog
This hotDog is quite easy to make, I did take the step-by-step photos to show how I made it and I hope you can give it a try. :)

IMG_6093
You will need two hot dog buns.

IMG_6094
I'm showing you how I cut out the various parts to minimise wastage. I don't throw food cut-outs away, I sometimes eat them myself (I'm trying not to do that often, it's probably one of the reason why I've problem losing weight.-_-), but most of the time I use them in the ways I've wrote about in this post. Okay, the head and body portion is self explanatory. But to make the legs, tail and ears, I used a knife to slice off the crust portion. To make the legs and ears, I also used the bread crust from the bottom.

IMG_6095
Here's roughly how you should cut out the ears, legs and tail.

IMG_6096
Take the body portion, slice the buns half way through lengthwise and fill with sausage and lettuce.

IMG_6097
Assemble the head and ears, you can secure the parts using pasta sticks. I only used pasta stick to secure the ears, since this is to be placed on a table of eating, the head portion won't shift.

IMG_6104
Assemble the legs by placing them under the hot dog bun. Using a round cutter, cut out cheese for the eyes.

IMG_6106
Using a pair of scissors, cut out the eyes and eyebrows from nori. Fold nori in half before cutting, that way you will get a pair of the cut-outs. If needed, use some mayonnaise to "stick" the cut-outs onto the bread buns.

IMG_6107
Using a round cutter, cut out ham for the cheeks. I used half an olive for the nose. Attach them onto the bread buns using pasta sticks or you can also use mayonnaise to "stick" them on.

IMG_6109
Squeeze out ketchup and mustard on the sausage before serving.

IMG_5112
I had another sausage at the side for the boys to eat with the head portion, else they might complain there's not enough sausage, lol. :P