Sunday, 10 August 2014

Hello Kitty Steam Cake

It's the National Day weekend over here in Singapore. School was off early on Friday, and there's no school tomorrow. Unfortunately, the rest of us caught the stomach flu from LT on Friday. My hubby and me have recovered today but IT is still unwell. What a way to spend our holiday. :( On a positive note, at least it happened over the holidays and we have time to rest and recover. Praying IT gets well by tomorrow as he has exams next Tuesday and Wednesday. Unfortunately, he has not been able to do much revisions as he has been sleeping most of the time due to the stomach flu.

IMG_9402
I was looking at the date of these Hello Kitty steam cake photos and realized I made them in May. I had wanted to update the recipe earlier but somehow kept dragging till now.

IMG_9408
Hello Kitty steam cakes were made using Morinaga pancake mix. If you can't get hold of the pancake mix, you can click HERE to refer to my previous recipe instead.

IMG_9411
I liked how these Hello Kitty steam cake turned out, another one I like from my creation is the piggy steam cake I shared earlier. Click HERE to check that out if you missed it.  

HELLO KITTY STEAM CAKE

Ingredients:
(makes 4-5 steam cakes)
150g Morinaga pancake mix
2 small eggs
30g sugar
45g milk
45g plain yoghurt
20g unsalted butter, melted
1 tsp baking powder
1 + 1/2 tbsp plain flour
1 tbsp cocoa powder
a little Wilton pink icing paste
a little Wilton yellow icing paste

Method:
  1. Whisk egg and sugar in mixing bowl.
  2. IMG_8872
  3. Add in yoghurt and milk till well blended.
  4. IMG_8874IMG_8875
  5. Stir in melted butter.
  6. IMG_8878
  7. Sift in pancake mix and baking powder and fold till well blended. Set aside 1 tbsp of the mixture and fill it in a pipping bag, you will need it for step 10 later.
  8. IMG_8876 IMG_9042
  9. Scoop 2 tbsp of batter from step 4, add 1 tbsp of dark cocoa powder,mix well. Spoon in pipping bag.
  10. IMG_8880
  11. Scoop 1 tbsp of batter from step 4, add in 1/2 tbsp of flour. Add on a little yellow colouring using toothpick. Mix well. Spoon in pipping bag. Scoop 2 tbsp of batter from step 4, add on some pink colouring using toothpick, mix well. Spoon in pipping bag, set aside for step 10 later.
  12. IMG_8881IMG_8885
  13. Fill cupcake cups with remaining mixture, fill till around 70% full. Tap cups lightly to remove air bubbles.
  14. IMG_8884
  15. Pipe on Hello Kitty details, brown for eyes and whiskers and yellow for nose. 
  16. IMG_8888
  17. Steam cupcakes over preheated steamer on low heat for 12 minutes. When steaming, please cover pot lid with a cloth, to prevent water from dripping onto the cakes and spoiling the designs. 
  18. IMG_9039IMG_9380
  19. Pipe out ears using white dough from step 4. Pipe out bow using pink dough from step 6. Pipe on a tray lined with baking paper, steam for around 3 minutes.
  20. IMG_9381
  21. Make a cut with a knife on the cake, so that you can slot in the ears.
  22. IMG_9382IMG_9384
  23. Attach on bow using pasta.
  24. IMG_9385

Wednesday, 6 August 2014

Cuddle Palz Bento

Thought I better do up a post today, as I'll be busy watching Korean dramas the next few days, most the shows I'm catching currently happens to be airing on wednesday and thursday, lol.  More Cuddle Palz creations to share, not exactly bento, as none of them were packed in a box.

 IMG_1553
Instant cuteness to tortilla chips, with the help of Cuddle Palz. I got this awesome idea from Kathy of Eclectic Lamb and I used the recipe Rebecca from Bentos on the Bayou shared on her blog. A shout-out to Kendra from Biting The Hand That Feeds You as well, as she was the first blogger who used CuteZCute to cut out tortilla chips. :) Do check out their blog for lots more lunch packing ideas. :)

IMG_1548
I made some salsa for my boys to dip their tortilla chips in, but I think most of the salsa went into my tummy, they were happy to just munch on the chips.

IMG_1702
Instead of using the usual burger bun for burger, I decided to use bread instead. I cut out the bread using Cuddle Palz and placed it on top of a beef patty, lettuce and cheese.

IMG_1699
Sandwich burger was served with fries and asparagus soup.

IMG_1697
Not sure if you noticed, I placed the beef patty directly underneath the bread, the dark brown patty brought out the Koala's features perfectly.

IMG_1876
The last food art I'm sharing today is this bear sandwich. :)

IMG_1873
Made this for IT's snack, he eats a lot these days and is almost as tall as me, just a few centimetres short. In case you are wondering, I'm not that tall, but not exactly short either. I'm 5 feet 3, he's almost 5 feet 2 and only 10 years old.

IMG_1872
Bear was a nutella sandwich, which he ate with carrot soup. I still have more CuteZCute creations, will update them next time. :)
Bunting---Dots-and-Stripes---Rainbow---11
Where to get the same item used in today's post:

Tuesday, 5 August 2014

Maleficent Bento

LT was running a viral fever over the weekend, which we self-medicated with paracetamol. He woke up all well yesterday, so I sent him to school. He showed no signs of sickness yesterday, but alas, he woke up vomiting today. :( I brought him to the doctor after fetching IT from school, looks like a case of stomach flu. He can't keep any medicine or food down, hope it will be much better tomorrow. He is still very active and his usual cheeky self, does not look sick at all if you don't see him vomiting.

IMG_1928
Alright, get back to the bentos I'm sharing today. Maleficent bento cut out of nori, this was a last minute idea. I was doing revisions with IT last sunday, was feeling bored sitting at the table with him, so I took out some nori to cut Maleficent while he was doing his work. I only sketched out the outline, I just cut the facial details freehand, using a pair of scissors. Does not exactly looks like Maleficent I guess, my boys thought so as well, lol.
IMG_1925
I layered the nori on cheese, wrapped with cling wrap, and kept it in an air-tight container in the fridge overnight. I then took it out to decorate the dinner bento yesterday.

IMG_1937
The side dishes were dry curry chicken, broccoli and strawberries. Cooked some teriyaki cod fish as well, but I did not pack it in.

IMG_0052
This cutie version of Maleficent was made much earlier, when the movie started showing in cinemas here.

IMG_0042
Ingredients used to make Maleficent were rice, nori, strawberry and cheese.
Bunting---Dots-and-Stripes---Rainbow---11
Where to get same or similar items used in today's post:

Friday, 1 August 2014

Totoro Macaron

I know some of you have been waiting for my Totoro macarons recipe, sorry for the delay. Thank you for your patience, managed to get the recipe updated today. :)

IMG_0004
I've forgotten when I made these, I think it was during the June school holidays.

IMG_9991
These Totoro macarons were made using black sesame, I added grinded black sesame into both the shells and buttercream. :)  The white portions were also done using macaron batter, hence there will be an extra step to prepare another white batter in my recipe. If you find it too much of a hassle, you can pipe on the white portions using melted white chocolate or icing after the macarons are baked.

IMG_9992
I found the grey colour a little too light, hence the details on Totoro's tummy was not that obvious. I suggest increasing the amount of grinded black sesame a little (remember to decrease the amount of ground almond proportionally). Please note that the recipe I am sharing below is the actual amount I used to make them. Alternatively, you can skip that step and use a black food marker to draw on Totoro's tummy instead.

TOTORO BLACK SESAME MACARON RECIPE
Ingredients:
Totoro grey portion:
45g ground almond
35g grinded black sesame seeds
160g icing sugar
60g egg white, separated for 24 hours in advance

Totoro white portion:
40g ground almond
80g icing sugar
30g egg white, separated for 24 hours in advance

Buttercream:
60g egg white
110g butter, room temperature
110g fine castor sugar
50g grinded black sesame

Method:
  1. Sieve 80g icing sugar together with ground almond and grinded black sesame seeds twice. Alternatively, you can also use a food processor to pulse them till fine before sieving them once. Set aside.
  2. IMG_9894
  3. Beat egg white on low/medium speed until foamy, sieve 80g icing sugar in 3 batches, change to high speed and beat till soft peak form. You can turn up the speed and continue to beat till stiff peak, if you prefer a thicker macaron.
  4. IMG_4206IMG_4379
  5. Add step 2 icing sugar/almond/black sesame mixture into egg white in 2 batches, folding well to combine.
  6. IMG_9896IMG_9976
  7. Scoop batter into pipping bag with nozzle tip #1A attached. Set aside 4 tbsp of mixture in another pipping bag for step 7. Pipe out Totoro on a non-stick baking sheet. I piped out an oval shaped and used a toothpick to pull out the ears. Use a toothpick to prick the air bubbles. Leave the macarons to dry.
  8. IMG_4212IMG_9977
  9. Proceed to prepare the white macaron batter. Steps are similar to step 1 to 3, sieve 40g icing sugar together with ground almond. Beat 30g egg white with 40g icing sugar. Fold in both mixtures together. 
  10. IMG_4381
  11. Fill white batter in pipping bag, snip off tip or you can use a small round nozzle. Pipe out Totoro's eyes and tummies.  
  12. IMG_9978
  13. Using the batter set aside in step 4, pipe out inverted 'V' on Totoro's tummy. Dry macaron shells for around 30 minutes.
  14. IMG_9980
  15. Preheat oven to 150 degrees celcius. Bake macarons at middle rack for around 12-15 minutes. Once the feet appears (they should do so before 5 minutes) , place an oven rack above the tray of macarons and continue baking till 12-15 minutes is up. (this is to prevent the top of the macarons from browning) When baking is complete, do not remove the macarons from the tray, allow them to cool for a while before removing. 
  16. To make buttercream filling, combine egg whites and sugar in a mixing bowl. Whisk over a gentle simmering hot water bath, till all the sugar have melted. Remove from heat.
  17. IMG_4385
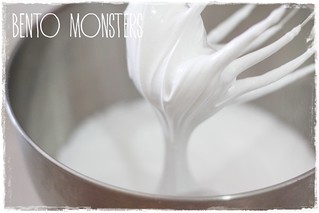
  18. Place on mixer and whisk on high till stiff peaks are formed.
  19. IMG_4429
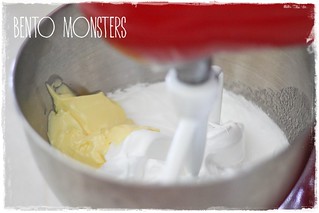
  20. Turn down the speed and add in the butter gradually, mix well.
  21. IMG_4433
  22. Mix in black sesame paste. Fill in pipping bag, refrigerate around 15 minutes before pipping onto your macarons. 
  23. IMG_9981
  24. Use a black food marker to draw Totoro's eyes and whiskers.
  25. IMG_9988IMG_0001
Note:
  • The amount of grinded black sesame seeds in the buttercream recipe can be adjusted to your preference. Just increase the amount of black sesame if you prefer the black sesame taste to be more intense, and vice versa.
  • The measurements for the ingredients is crucial. It is also important to whisk the egg whites and fold in the sugar/almond mixture correctly.
  • The need to use aged egg whites is debatable, but you should at least use egg whites at room temperature. I usually separate them the night before, leave in a bowl covered with cling wrap at room temperature.
  • Please ensure equipments are dry when beating egg whites, else you will have problem beating them till stiff peak.
  • It is necessary to leave the batter to rest for at least half an hour before baking, this is for the macarons to form a shell on top.
  • It's important to use a non-stick baking sheet, I usually bake mine on silpat mats.
  • Macarons taste better the following day, so if you can wait, keep in fridge and eat them the next day.
Bunting---Dots-and-Stripes---Rainbow---11
Where to get same item used in today's post:
 
↑