
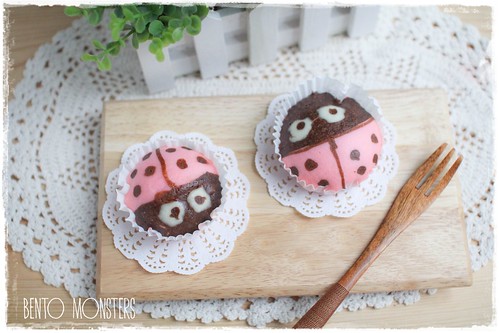
My not so nicely drawn ladybug steamed cakes. -_- I had no brown colouring at home and I ended up mixing in too much cocoa powder to get a darker shade of brown. I guess I wasn't thinking then, ended up with a very thick batter and had problem drawing. So, if you are thinking of doing the same, do add in the cocoa powder sparingly.
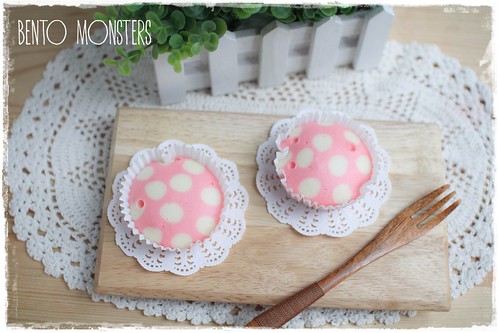
After the two badly done ladybug cakes, I decided to just draw polka dots instead, since that is way easier, lol. :)
I've updated the recipe in this post, did some trials and amended the recipe. I've also decrease the quantity as I felt the previous recipe yield too many cakes.

Please note that this cake is not as fluffy as your usual cakes, it's slightly denser than baked cakes. They are best eaten warm. In terms of taste, the ones I made using pancakes mix will be tastier.
LADYBUG STEAM CAKES
Ingredients:
200g cake flour
2 large eggs, room temperature
120ml fresh milk, room temperature
2 tsp baking powder
100g castor sugar
2 tbsp vegetable oil
1 tsp vanilla essence
red colouring
brown colouring
Method:
- Whisk egg in a mixing bowl, add in sugar and whisk till sugar is dissolved.
- Add in milk and vanilla essence, whisk to combine.
- Sieve over cake flour and baking powder, whisk to combine.
- Add in vegetable oil, stir till mixture becomes smooth.
- Scoop 1 tbsp mixture into piping bag.
- Scoop 4 tbsp mixture, mixed with brown colouring and put into a piping bag.
- Colour the remaining mixture red and put into a piping bag.
- Cut a small opening in the end of each piping bag.
- Fill cupcakes liners till about 80 per cent full with red mixture. Draw a half cross with brown mixture, add dots on both sides. Fill upper part with brown mixture.
- Make 2 dots with white mixture and fill inside with a brown dot.
- Steam on medium high heat for 15 minutes.


So cute! Must try to make this!
ReplyDeleteTks, Jean. :)
DeleteAh...Baking part I can only see...but this is really look so yummy!
ReplyDeleteTks, Sannee. :)
Delete有逗趣的可爱哦!:)
ReplyDelete谢谢,TM. :)
DeleteOh my gawd, SO CUTE!!!!!
ReplyDeleteTk u, Cindy. :)
Delete我很欣赏您的作品,也很喜欢。谢谢分享。
ReplyDelete谢谢你哦!
DeleteHi, is it compulsory to use ovalette?
ReplyDeleteEstie
Hi Estie, not a must, just better to use as it stabilize the cake.
DeleteOk..Thanks.
DeleteEstie
If we omit ovalette, do we need to adjust the recipe?
ReplyDeleteI read about ovalette is a chemical, quite reluctant to use since I am baking for my sons.
No need, just omit, I did not use it either, just copied from the original recipe I took from, I'll amend it.
DeleteHi, I have tried this recipe by omitting ovalette but the cakes seem hard and shrink after cooling down. Any idea?
ReplyDeleteTIA
Hmm, I'm not very sure, I did not use ovalette as well but it was okay. Texture/taste was like the usual steam cake. Could it be you did not beat it long enough?
DeleteLet me try making using this recipe for my next steam cakes and I'll see whether I can update my recipe notes.
DeleteThanks! Looking forward your update. Appreciate it!
ReplyDeleteBy the way, you are really great and creative in bento!
How do you steam them? They are so beauiful :)
ReplyDeleteThe usual way you steam your food. Placed in a steamer over boiling water. :)
Deletehi
ReplyDeletemay i know whats the main difference btw this steam cake and the japanese mushi cakes?
Taste quite similar.
Deleteoh i just tried, but it turned out hard and taste abit different.not sure what went wrong
ReplyDeleteIt's harder when cold, but soft when warm. Need to steam again b4 eating if not eating immediately.
Delete