
For the bentos today, I pre-moulded the rice and pre-cut out the cheese while the boys were taking a nap yesterday afternoon. I managed to take step-by-step photos and I hope you will find them useful. :)
Mario, Luigi and Yoshi. I'll start off with how to do Yoshi. :)

First, you find a photo of Yoshi, size it and then print it out. The next step is to trace out your picture on parchment paper. I do not own a printer, so I usually sketch out my picture instead.
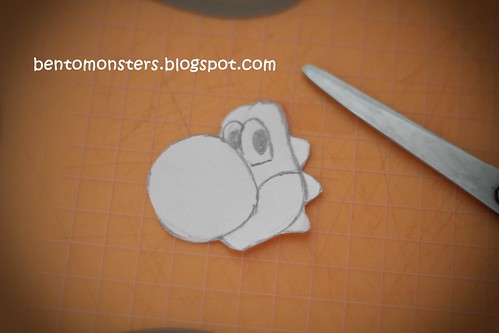
Cut out the picture and decide how many layers you want.
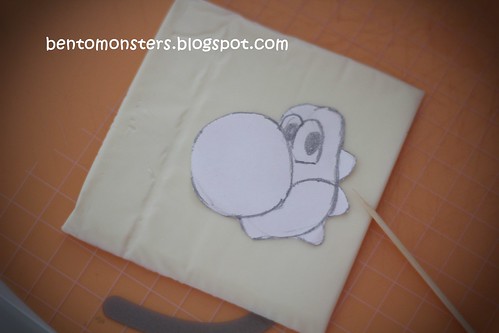
I am using cheese, as LT hates egg sheets. :( Cut out the outline with a toothpick.
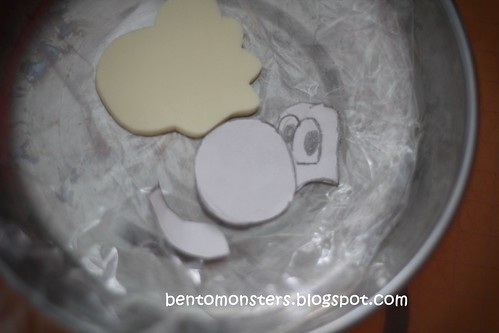
I will be doing 3 layers, these 2 cut-outs will be the second layer. :) You can wrap your cut cheese in cling wrap and store them in the fridge.
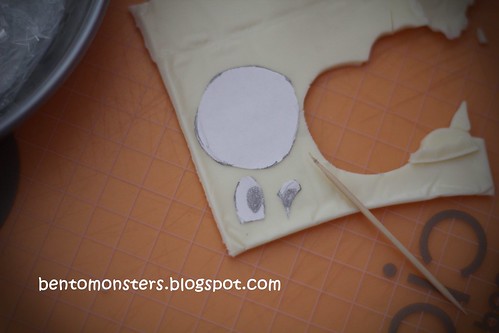
And this is my last layer, Yoshi's eyes and nose.
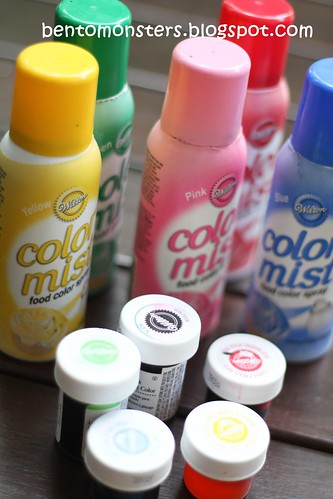
And these are what I use to color my cheese, I prefer to use the spray mist coz you just have to spray it on and wait for a while for the color to settle. :)
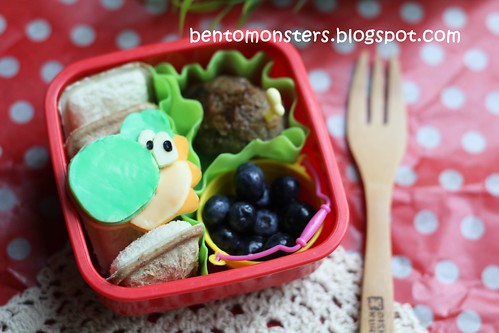
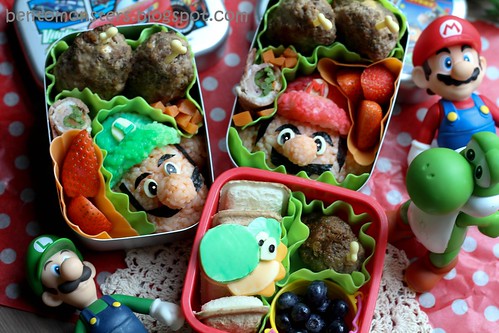
And this is the completed Yoshi. I colored the cheese and added on the nori this morning. This is IT's box for recess, he had peanut butter sammies, blueberries and meat patty.

Now, we go on to making Mario and Luigi. I usually use this deco furi to color my rice. You can find it at Daiso. It comes with a mild salmon flavour, the boys love it.
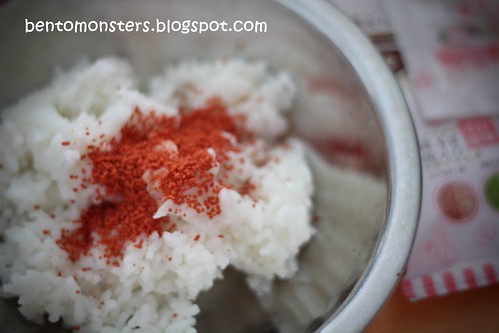
You just have to pour in when your rice is still warm and mix it up.

Mario checking out on the color. lol. :)
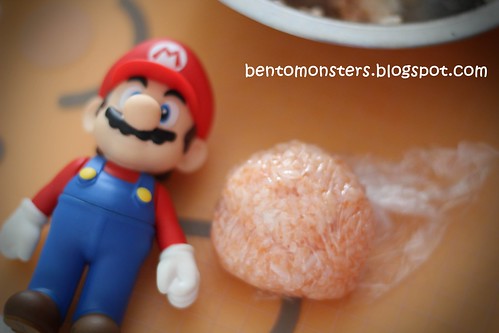
Mould Mario face using cling wrap.
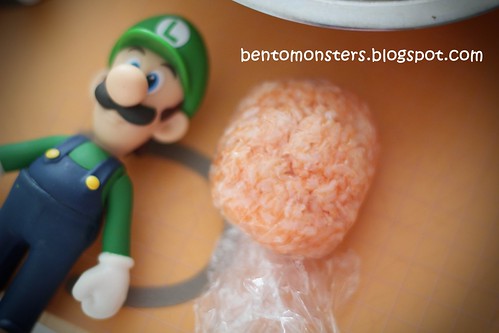
Luigi face is longer.

Mould out the ears and nose.

Mould out the hat with white rice. Then pour some deco furi only on the surface, do not mix it in. This will give you a more vibrant color.
Assemble the hat. Dun worry too much about the uneven colors on the hat, it will not be obvious after you assemble the bento.
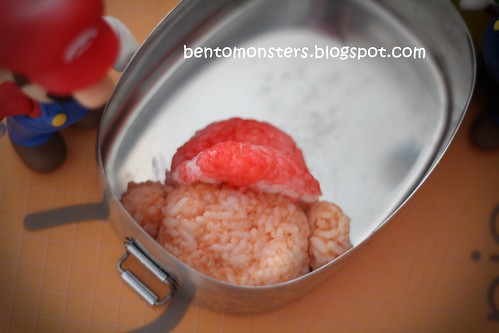
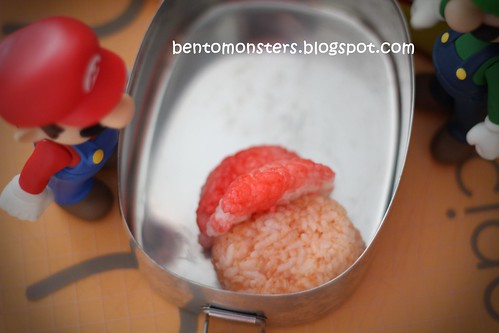
Assemble on the ears. I changed to a smaller lunchbox after this.
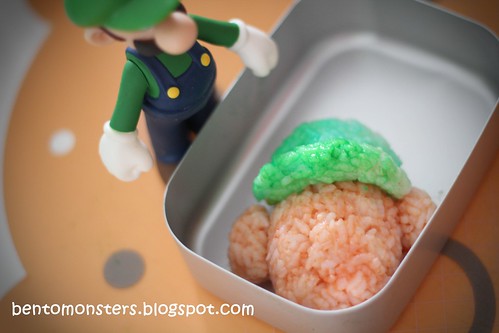
Do the same for Luigi, I've used colour mist for the green here. :)Wrap them with cling wrap if you are going to keep them for the next day.
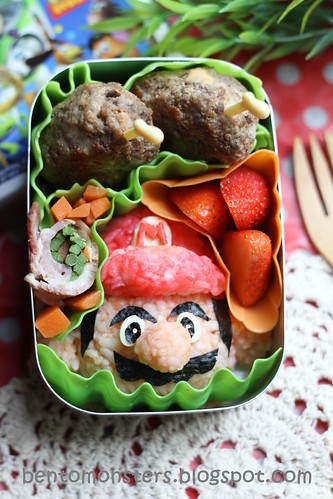
This is the completed Mario, I added on the nori and cheese this morning. I cut out the nori free-hand and used a puncher for the eyes. The nose is attached on with uncooked angel hair pasta. It will soften by lunch time and will be safe to be eaten. This box is for IT, he had onigiri, bacon rolls, meat patties, strawberries and carrots.
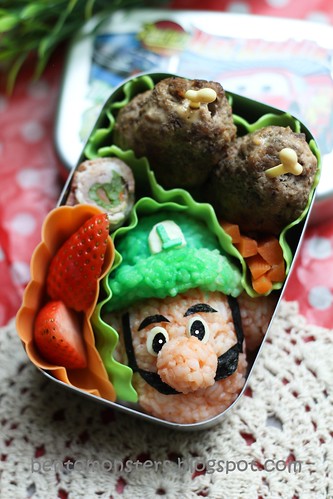
Luigi is for LT, he had the same food as above.
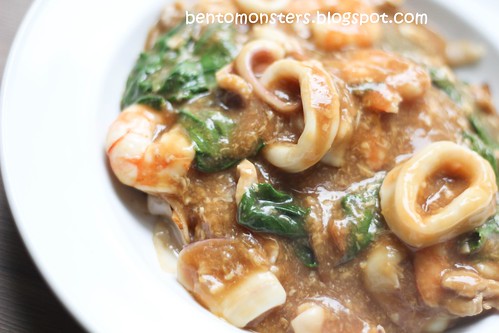
This is seafood hor fun, our dinner from last Friday. I was feeling lazy, so I just dished out a one dish meal. lol.
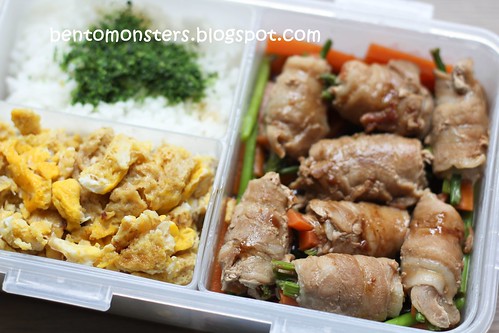
This was my lunch today, rice, crabmeat omelette and carrot/asparagus pork rolls.
Such a long post today! If you are still reading until here, I would like to say a big thank you to you. :) I hope you can understand the steps, as I'm really bad with words. :)


Good stuff! From Emily
ReplyDeleteTks Emily, hope u found it useful, :)
DeleteAwesome tutorial I will do it , even though my little one has no ideas who these guys are!! Ha! But looks so much fun! (I wonder is Diaso ships to Finland?)hmmm
ReplyDeleteOh and youre luch looks super yummy too! GREAT POST!
Haha, Mommy Kiki, hv fun making them. I'm not sure abt tt but I know Jlist has the deco furi and they ship worldwide, :)
DeleteGreat step-by-step tutorial and the bentos looks amazing!! Oh,the 'hor fun' makes me crave for some :)
ReplyDeleteI have been making 'bak kwa; for few days. Everyone is loving it. Thanks for the recipe!! Never imagine in a million years I have to make them myself.
Tks so much, Rina. :) Awwwwww, great you had fun making the bak kwa! :)) haha, yeah, I never expected them to be able to make them myself too. :)
DeleteWow! Your lunches are works of art. Thanks for posting such a detailed tutorial!
ReplyDeleteTks, Keitha, hope you found it useful. :)
DeleteGREAT tutorial!
ReplyDeleteTks so much, Diana. :)
DeleteAdorable lunches! And the tutorial is great :D
ReplyDeleteTks so much, Jenn. I'm still waiting for my color markers to arrive so I can try drawing on cheese. :)
DeleteGreat job. One day I'll try shaping rice into fun shapes onigiri, but for now I'll stick to decorating the top of the bento.
ReplyDeleteTks, Mewlkitten. :) You decorations on top are awesome too! :)
Deletevery inspiring ,, very like your mario and luigi bento
ReplyDeleteTks, cute little bento. :)
Delete