
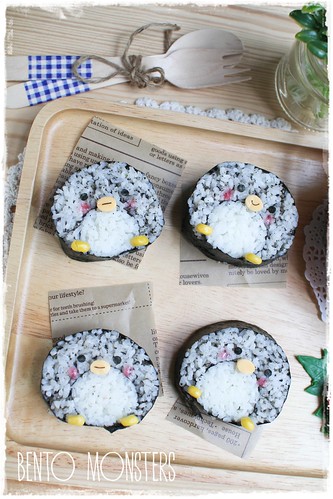
Grey portion of sushi was coloured with black sesame.
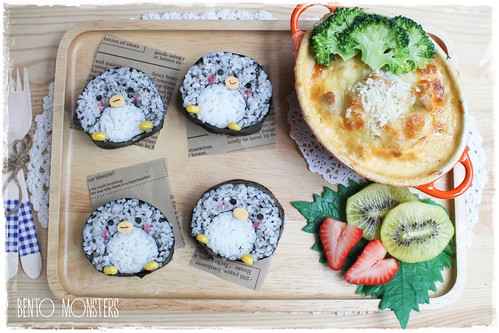
I cooked cheesy baked chicken for my boys' lunch that day. I simply cooked chicken with milk and the leftover cheese cut outs I've accumulated. Then, I added shredded cheese and panko on top and baked it in the oven.
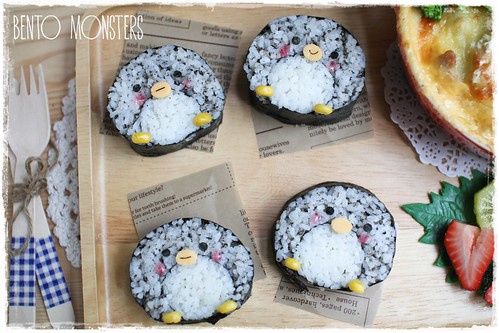
Cheese, corn and nori were used for the penguin's details.
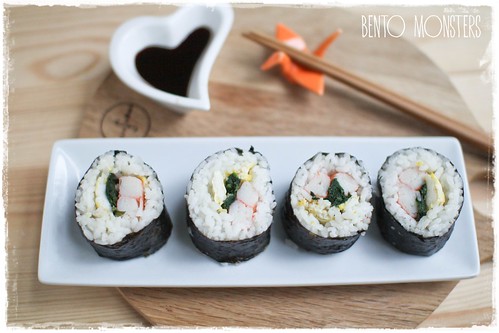
I had these sushi for my breakfast that day. Sushi was filled with spinach, egg and kanimi. I've been lazy these days and just rolling the sushi with my hands, without a mat. -_-
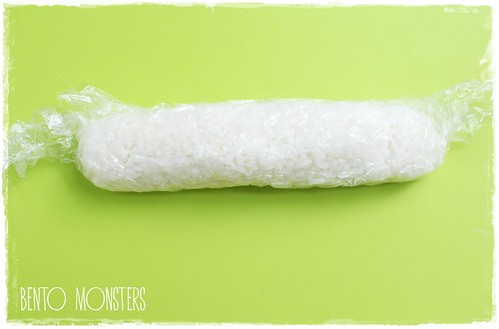
To make the penguin sushi, cook around one cup of rice and separate rice into two portions. Roll one portion into a tube using cling wrap, compress the rice as you do this. Wrap rice with seaweed after you are done.
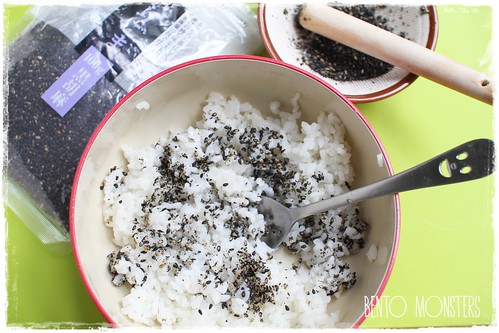
Mix the other portion of rice with grinded black sesame. There are ready grinded packs of black sesame sold in some stores. I just used up mine and could not find them in the marts near me. If you can't find the grinded kind, you can grind them yourself using a food processer or a pestle. Mix in the grinded black sesame a little at a time, till you are happy with the colour of the rice.
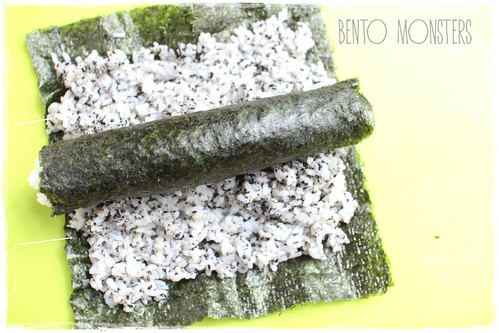
Spread the black sesame rice evenly on a sheet of nori, adding one more layer of rice between the two white arrows indicated in the picture above. Place the white tube of rice on top, roll up and compress your rice. I just roll up using with my hands but a sushi mat is recommended.
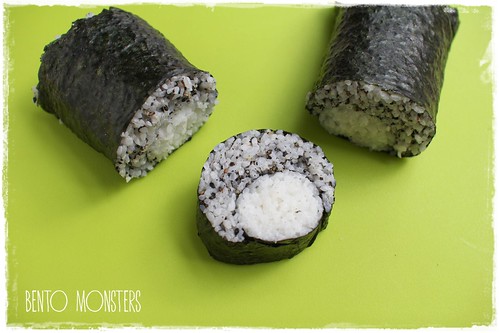
Slice up your sushi with a sharp and wet knife. I have made girls and Totoro out of these sushi before too. Click HERE and HERE to see.

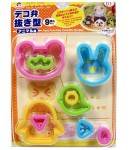
Cut out ovals for mouth. The picture shows the puncher I used for the eyes.
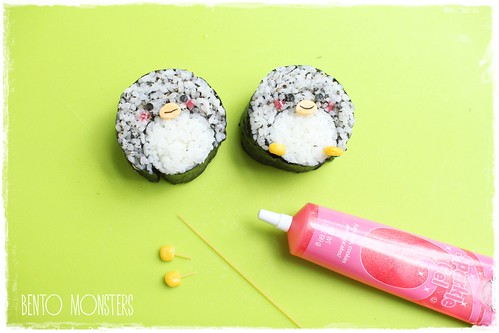
Attach on corn with pasta and dab on decor gel for the cheeks.
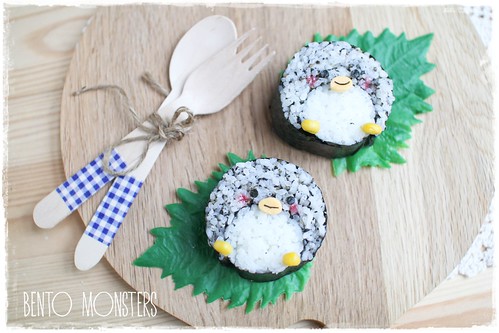
And the penguin sushi are done. Sorry, I know I did not do a good job explaining, but hope the photos help you to understand how I made them. :)

Where to get same or similar items seen in today's post:


Adorable! Thanks for the tutorial.
ReplyDeleteTks, Kathy! :)
DeleteThat is absolutely adorable Ming! I always love your easy to follow tutorials and thanks for sharing!
ReplyDeleteTks, Rina, u are always so sweet!
DeleteI love this penguins!
ReplyDeleteTks, Sannee. :)
DeleteThis is way too cute! thanks for the tutorial!
ReplyDeleteTks, Shirley, you are too kind, u definitely don't need this. :)
DeleteThanks for the tutorial. will try it again. :)
ReplyDeleteTks, TM. :)
DeleteLove the penguins they are so so cute!!
ReplyDeleteLove the tutorial!! Thanks for sharing (*¯︶¯*)
ReplyDeleteTks, Karen. :)
DeleteLove the penguins, they are so cute! Thanks for sharing the tutorial! When I make deco-sushi I also use this method, since I can't do it the right way too!
ReplyDeleteLol, tks, Jean, I can't do it the right way either.
DeleteI just opened up your blog and it is amazing! Thank you so much for sharing... I haven't got the chance to make one of these cute penguins, but now i have learnt that my almost 20 months old daughter love sushi, i better make one soon! :D
ReplyDeleteAwwww, Tk u, so happy to hear that! :)
Delete