
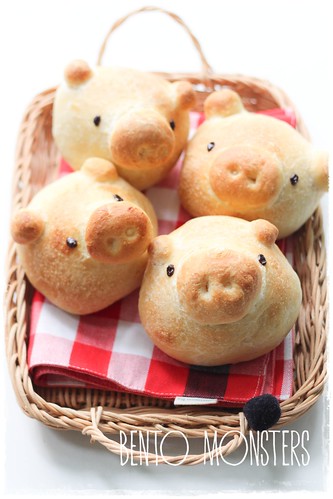
Decided to update about these piggy butter bread roll first. Trying out a new recipe this time, it's a dinner butter roll recipe, with a crispy buttery crust. If you prefer, you can also substitute with any of your favourite bread buns recipe or use any of the previous bread recipes I shared before.
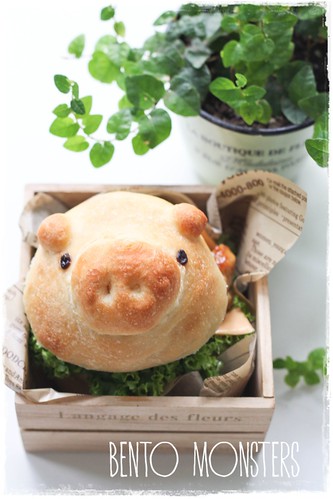
Piggy burger for dinner that night. :)
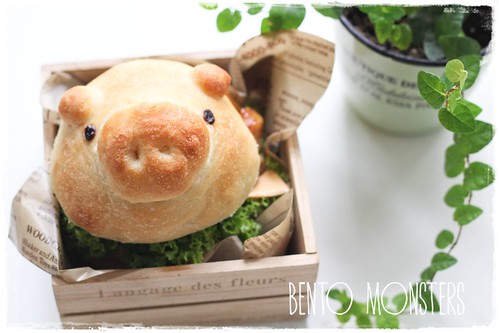
There's actually an eatery in Singapore selling similar piggy burgers, saw Honey Bee Sweets sharing about them on her Instagram account. She also baked piggy buns and turned them into piggy burgers, they looked so cute, I had to bake some too.
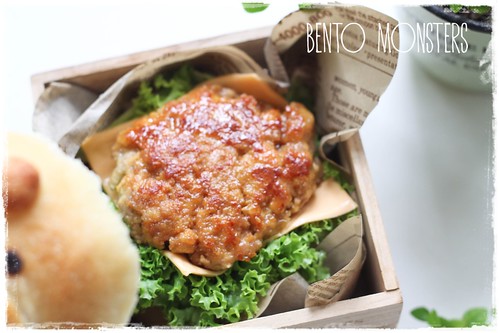
The teriyaki pork patty I made for the piggy burger.
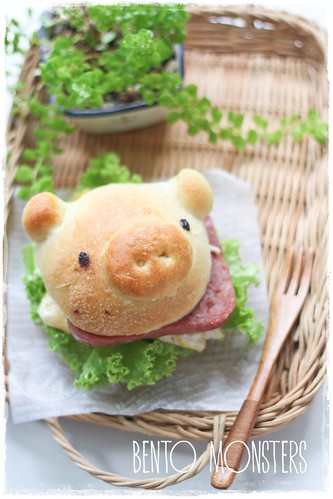
I kept some piggy buns for breakfast the next day. This time, we had them with luncheon meat, egg and lettuce.
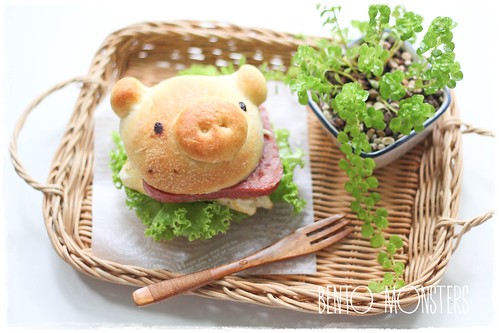
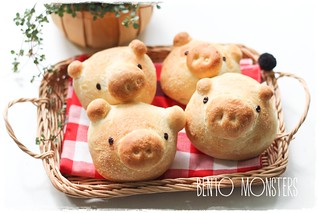
I used melted chocolate to draw the eyes. However, I had wanted to use raisins, but forgot to buy them. -_-
PIGGY BUTTER BREAD RECIPE
Ingredients:
Bread Flour 450g
Instant Yeast 14g
Warm milk 250ml
Sugar 2 tsp
Butter, room temperature 40g
Salt 1/2 tsp
Method:
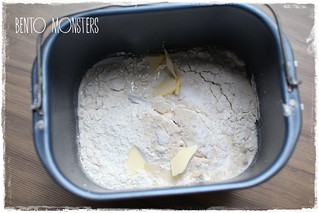
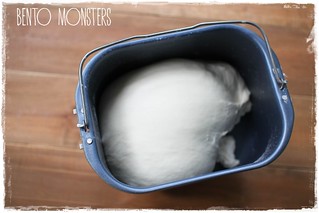
- Mix all the ingredients, except butter, in a large bowl to get a dough. Add in butter and knead until dough is springy and soft, this takes around 10 minutes. If you have a bread maker, you can just use the dough function for this step, as well as step 2.
- Cover the dough with cling wrap and keep in a warm place for it to rise. This takes around an hour and the dough should double in size.
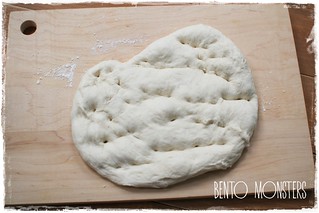
- Dust your work table with some flour, place dough on it. Punch out the air from the dough with your fist.
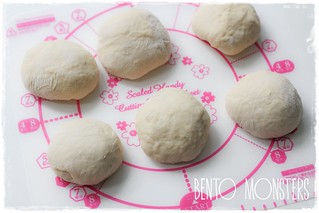
- Divide the dough into 6 portions. Roll them out and form them into balls. Cover with cling wrap and let the dough rest for 15 minutes.
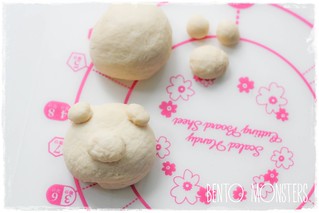
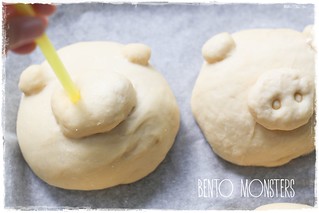
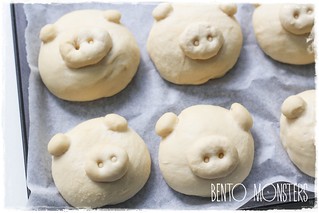
- Roll out bread dough and shape them, place them on a baking tray lined with parchment paper. Use one portion of the dough to shape piggy's ears and nostrils.
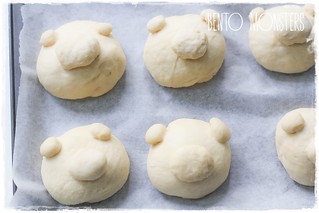
- Cover with cling wrap and let dough rise for 40 minutes.
- At the end of 40 minutes, poke 2 holes on piggy's snout using a straw. If you are adding raisins for the eyes, you can do so at this step.
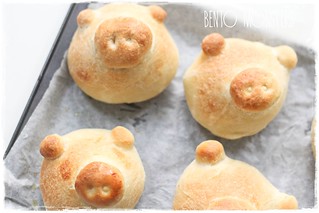
- Brush bread with melted butter.
- Bake at 180 degrees celcius for around 20 minutes or till they turn golden brown.
- If you did not use raisins for the eyes, you can draw in the eyes using melted chocolate.


*Applause* Such good technique, as always!
ReplyDeletehttp://thatumamilife.wordpress.com - a clean eating bento blog. Japanese or Asian-inspired.
Tk u, Liz. :
DeleteWow, cutest bread I´ve ever seen :-)
ReplyDeletehave to try to do them :-)
Tk u, Madelein. :)
Deletesuper cute!!! thanks for sharing!
ReplyDeleteTk u, Shirley. :)
Deletewow!! I want!!! Most kawaii piggy burger ever!!!
ReplyDeleteTk u, Karen. :)
DeleteThese are so cute!
ReplyDelete哇!好可爱的小猪猪汉堡!!
ReplyDelete谢谢你,婉婉。:)
Deletecan i know the name of the eatery that has those piggy buns you mentioned? :-)
ReplyDeleteI heard it can be found at this coffee shop in hougang called Seng
DeleteHuat coffee house. :)
Hi, what an adorable site ! You are very talented. I hope to try some of your breads for my grandchildren.
ReplyDeleteThank you so much for sharing your gift with us.
Truly, Luseelou