
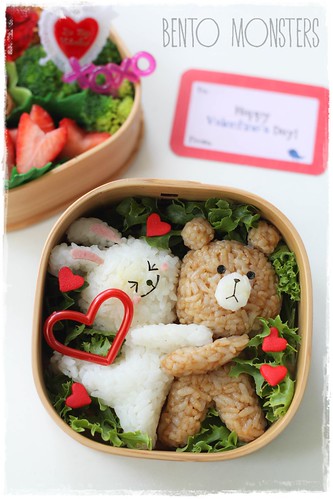
A Brown and Cony Valentines bento to start the ball rolling. Lol, really love this odd couple!

The side dishes for this meal were teriyaki pork, chicken cutlets and broccoli.

Ingredients used to make Brown and Cony were rice (brown rice coloured with some dark soya sauce). nori and ham.
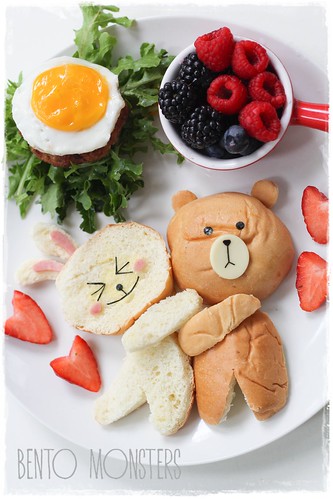
I made a burger version as well, managed to take some step by step photos for this. It's not difficult to recreate this, hope you can give it a try. :)
If you need a chicken patty recipe for your burger, you can check out my previous recipe HERE.
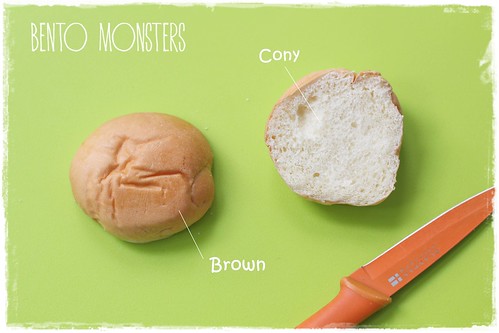
Here's how I made Brown and Cony burgers. First, slice your buns in half, keep the top part for Brown's head, and the bottom part will be Cony's head.
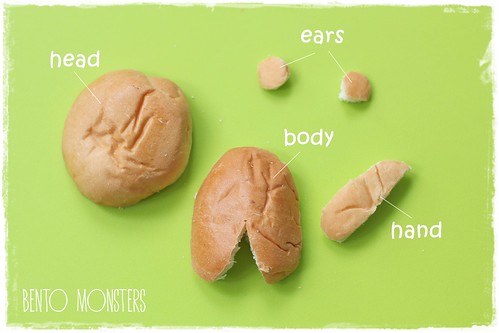
Slice another bun in half again. Cut out Brown's body, ears and hand from the top part.
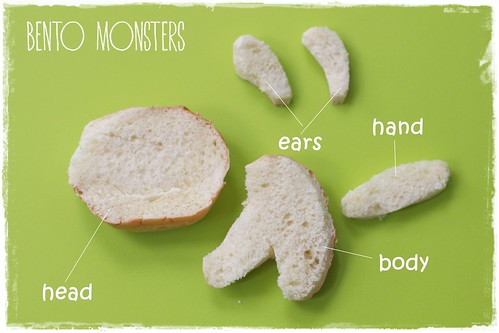
Cut out Cony's body, ears and hand from the bottom part.
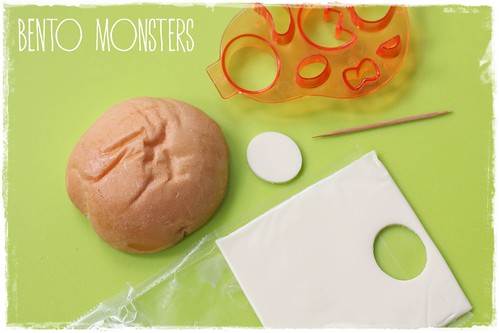
To make Brown's features, cut out cheese with an oval cutter. If you do not have one, you can use a toothpick to cut out instead.
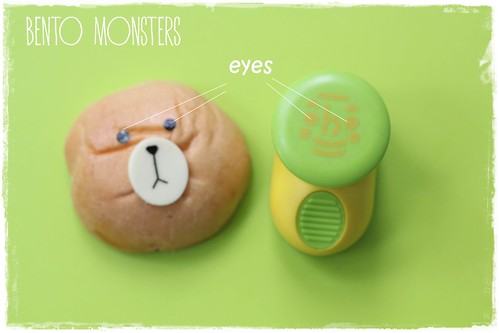
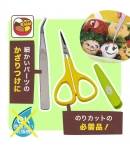
I used this puncher to punch out nori for Brown's eyes, the rest of the features were cut out using a pair of sharp tipped scissors. Dab some mayo on the bun before placing on the eyes, this will help the eyes to 'stick'.
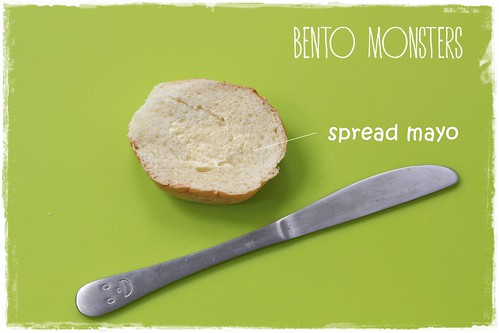
To make Cony's features, start off by spreading on some mayo or cream cheese. This will help the nori to 'stick' onto the bun.
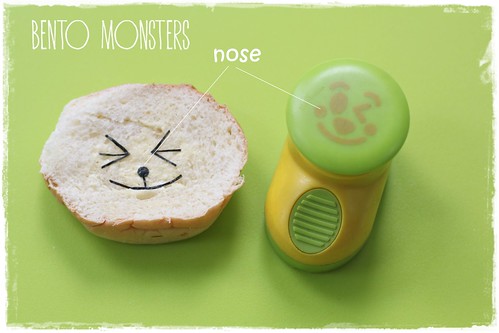
I used this puncher for Cony's nose. The other facial details were cut out using a pair of sharp tipped scissors.
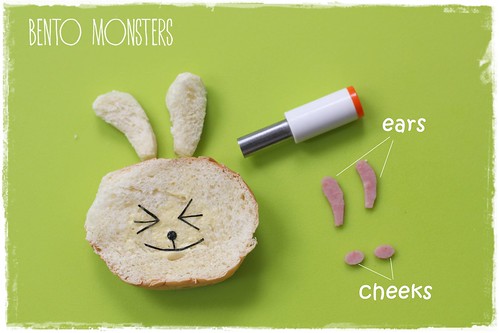
Cut out cheeks and ears from ham. I used an oval cutter to cut out the cheeks. If you do not have one, you can use a straw to cut out too. Just squeeze the straw so you get an oval shape, and you can cut out your ham with that.
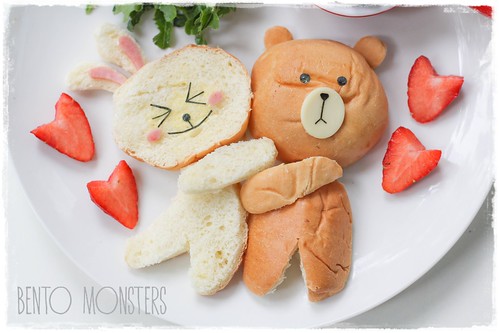
Just assemble everything onto a plate or in a bento box. If you are packing it in a bento box and bringing it to work/school, you might want to use pasta to secure all the parts. :)

Where to get same or similar items used in today's post:


哇!!好可爱!!你的饭团Cony让我看了好开心^^
ReplyDelete好有创意的面包两面用法!
谢谢你!
DeleteAww, they are so cute Ming!! I love both versions.!:)
ReplyDeleteTk u, Rina. :)
DeleteThanks for sharing this wonderful tutorial. Both very cute!
ReplyDeleteawwww.... sooooo in love!!!!
ReplyDelete