
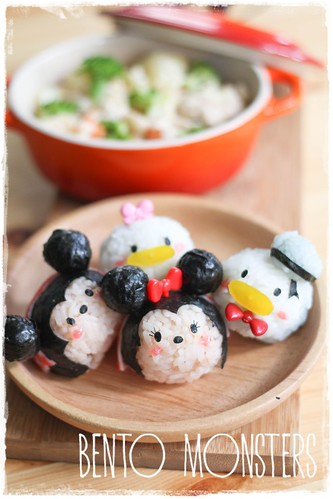
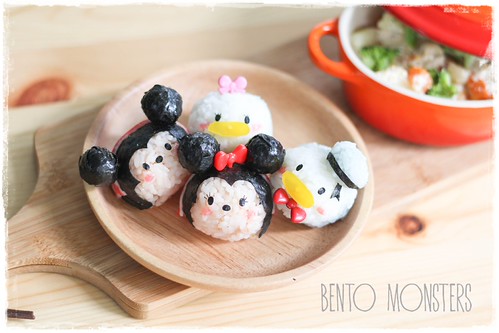
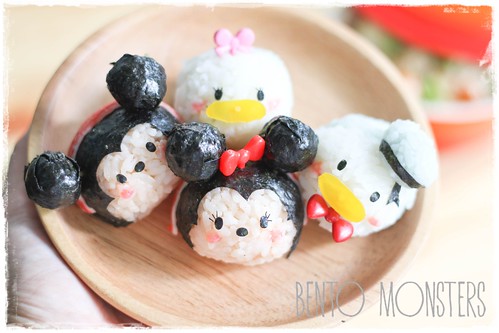
This time, I decided to make Mickey, Minnie, Donald and Daisy. I took some step-by-step photos on how to make Mickey and Donald, hope you find them useful. :)
Served a pot of chicken milk stew as the side dish, ingredients were chicken, broccoli, mushrooms and carrots. :)
I wish I have the time to make many TSUM TSUM at one go, it will be really cute to see so many of them stack onto one another.
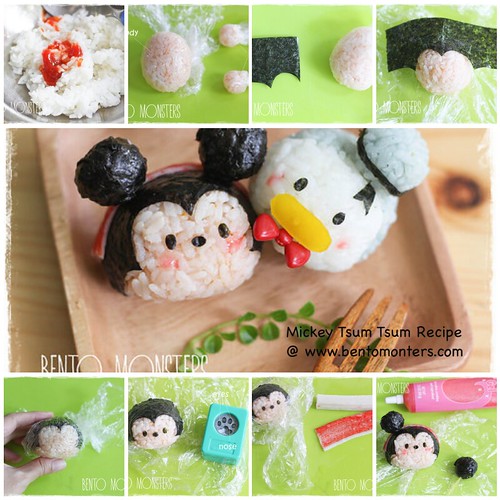
I only make step-by-step on how to make Mickey.
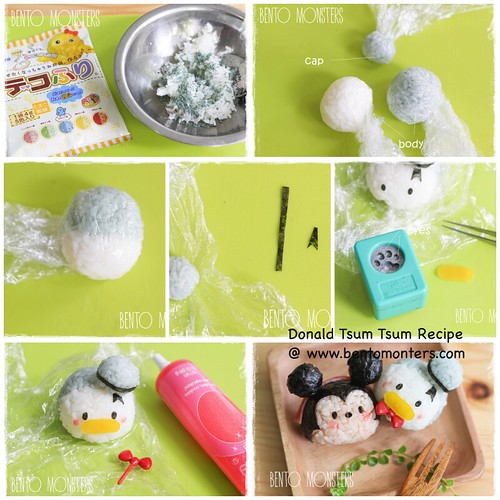
And also Donald, details are below.
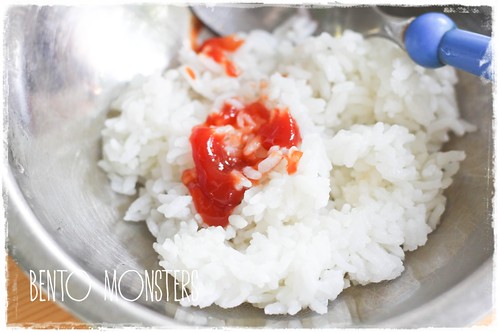
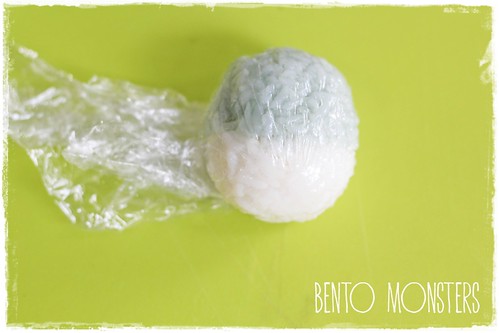
I'll start off with Mickey. First, colour rice with some ketchup.
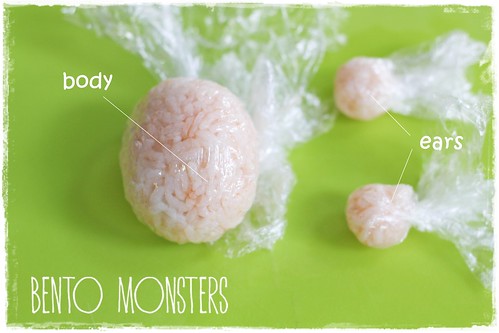
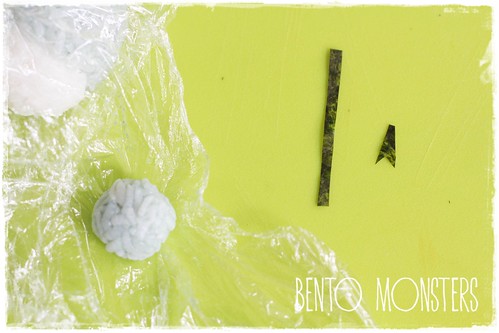
Shape Mickey's body and ears using cling wrap.
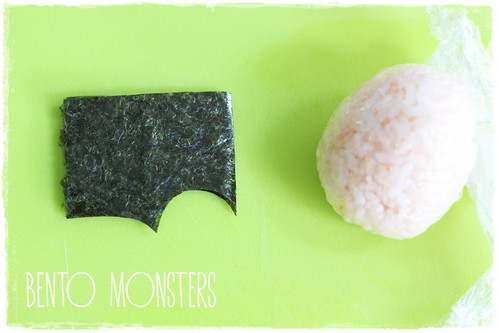
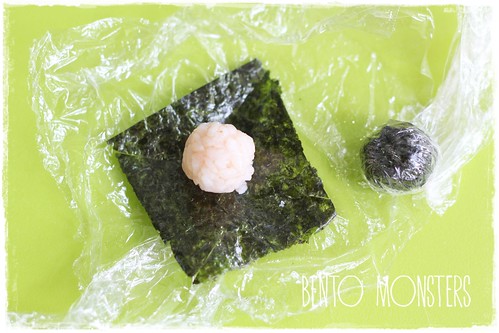
Fold seaweed in half and cut out the shape as shown in the picture above.
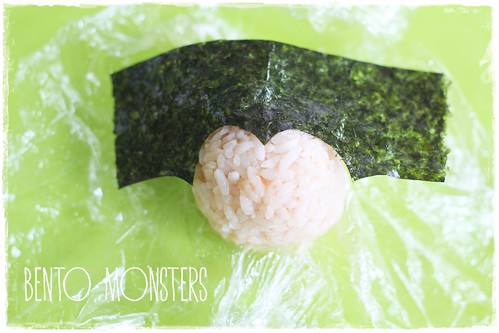
Place seaweed on rice ball.
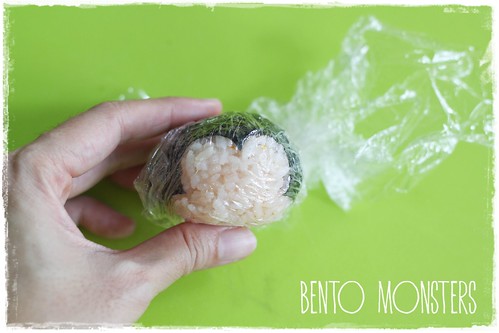
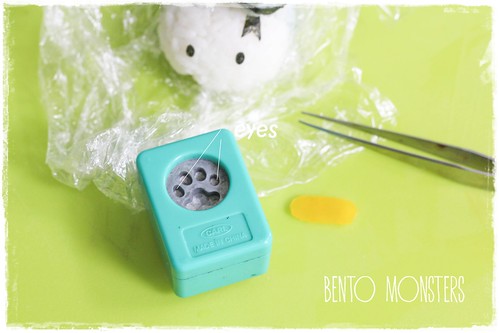
Wrap rice ball in cling wrap to secure the nori well.
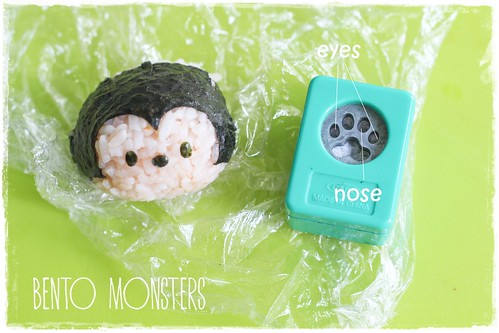
Punch out ovals for Mickey's eyes. I used the ovals on this paw puncher.
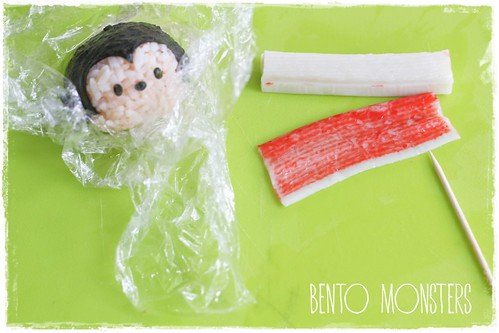
Remove red portion of crabstick using a toothpick and wrap around Mickey's body.
Wrap the ears with nori, make some cuts at the 4 corners of the nori before wrapping. Wrap with cling wrap and secure it well.
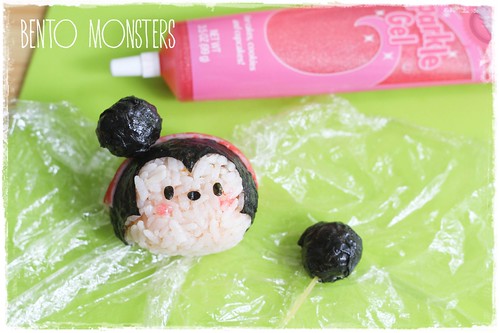
Secure Mickey's ears using pasta. The pasta is uncooked, it will absorb the moisture from the rice and soften after sometime. However, if you are going to eat this immediately, please use fried pasta instead. Dab on some blusher on Mickey's cheeks using decor gel.
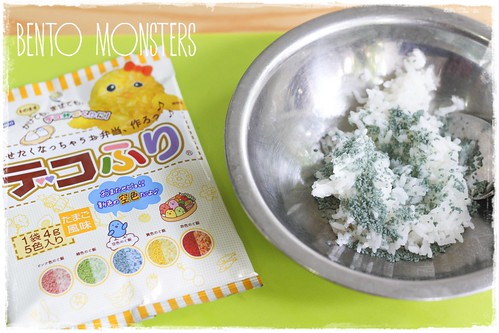
To make Donald Duck, I used this Deco Furi from Daiso to colour the rice blue. It's more convenient when you only want a small portion of your rice blue. Other ways to colour your rice blue includes using the water from butterfly pea flower, purple cabbage (with a bit of baking soda added) or food coloring to cook your rice.

Using cling wrap, mould Donald's body using blue and white rice, also mould a small rice ball for his cap.
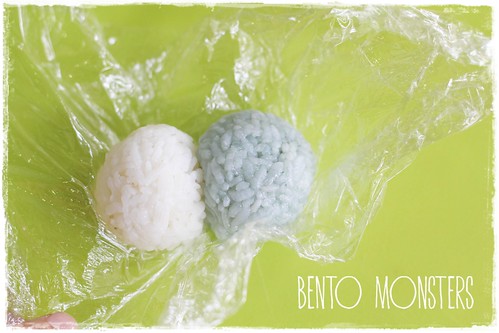
Join the white and blue rice together to form Donald's body.
Wrap with cling wrap and mould them together.
Cut out nori for Donald's cap.
I used this puncher for the Donald's eyes. Cut out oval for Donald's bill using capsicum, attach onto rice ball using pasta.
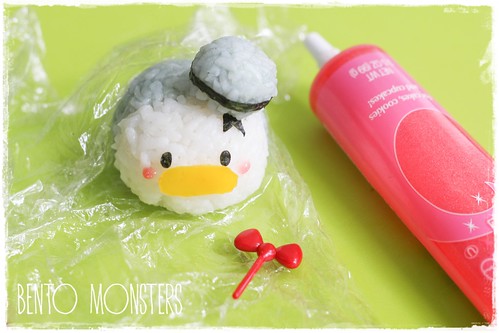
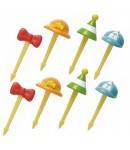
Dab on blusher using some pink decor gel. I used a pick for Donald's bow tie.
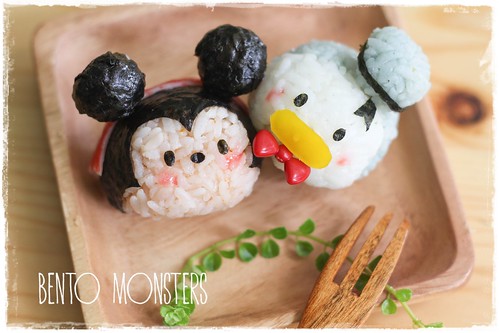
Ta-dah, the completed pair. :) Have a good weekend, will be back again to update next week. :)

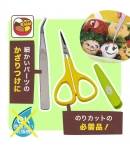
Where to get same or similar items used in today's post:


Aww! So cuuute! :D
ReplyDeleteTk u, Lau Lotte. :)
Deletelove donald! super cute
ReplyDelete这太可爱了!!!乍看之下,我还以为是玩具呢!^^
ReplyDelete谢谢你,婉婉。:)
DeleteI love the tsum tsums too, this is adorable!
ReplyDeleteAdorable! Thanks for the tutorial!
ReplyDeleteTk u, Kathy. :)
DeleteThey are super adorable, I love them all!:)
ReplyDeleteTk u, Rina. :)
DeleteThis is so fantastic! Thank you so much for posting directions!
ReplyDeleteTk u, Tina. :)
DeleteExcellent!!
ReplyDeleteThank you for sharing
U mention using pasta as a glue...what kind of pasta?
ReplyDeleteJust the usual pasta used for spaghetti, if you are not eating it immediately, you can use raw ones, they will soften after sometime. However, if you are eating immediately, then use fried pasta(just shallow fry pasta in oil till brown).
DeleteI'm not going to eat it right away I want to save it for the next day. Do I put it in the fridge and then microwave it the next day so the rice won't hardem? Or plastic wrap it for the next day?
ReplyDeleteThis comment has been removed by the author.
DeleteYou have to wrap it and put in a covered container in the fridge, and the ears should be packed separately and assembled the following day.
Delete